How to Create a Social Wall

Overview
To create a social wall for your event, you need to register for an Everwall account and subsequently sign in to your account. You can have multiple social walls in your account, so if you already have an account you do not need to register for another one.
You can create a social wall at any time leading up to your event—you don’t need to wait until your event date. Additionally, creating a wall does not mean you have to purchase it at that time, you can create it now, and then save it for later.
If you choose to create your social wall in advance you can start a 3-hour trial to test that everything works as you expect.
In addition to the 3-hour trial that’s available, if you purchase your social wall in advance, you’ll get a free 72-hour pre-event monitoring window that allows you to test everything related to your wall.
How to Create a Social Wall
Step 1: Once you are logged in, click the Create Wall button if you don’t have any social walls, or the New Wall button in the header.

Step 2: Select where you want to show your social wall from the options:
After choosing your option, click Create an (selected option) Social Wall button.
Note: For this tutorial, I am selecting the “At an event” option, and the remaining steps will be based on that selection.

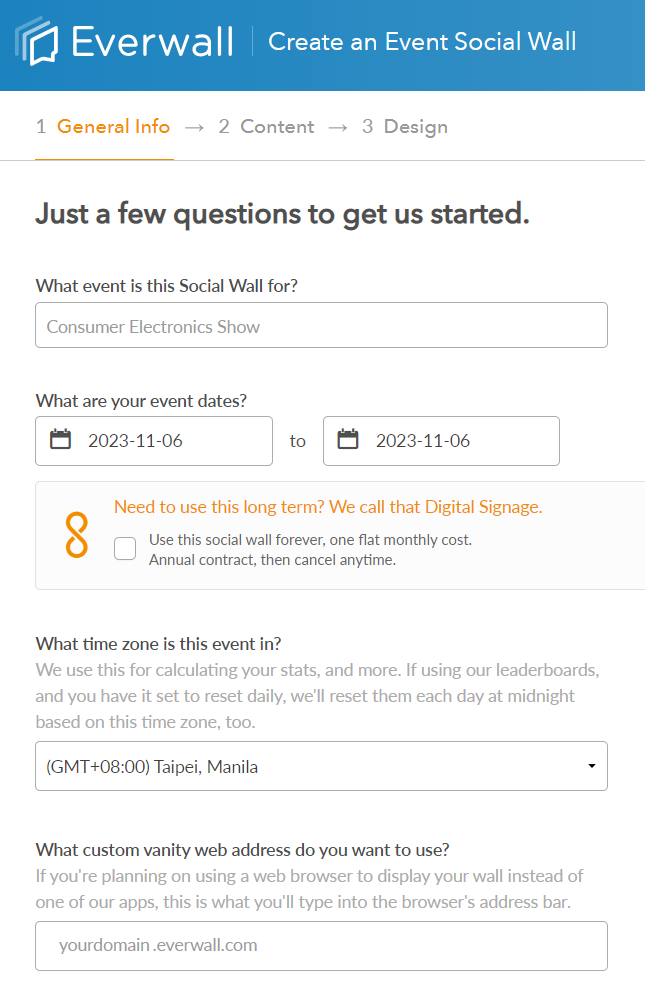
Step 3: After choosing the type of social wall, you will be redirected to the General Information page where you can set your social wall details such as:
- Event name
- Event dates
- Timezone
- Vanity web address
You’ll notice that we do not ask you for the time of the day, just your event days. We don’t ask for that information because with Everwall, you get the full day from 12:00am (midnight) to 11:59pm.
When all details are complete, click Next Step to proceed to the service level options page.
Step 4: The service level options page allows you to select the different service levels we offered, these are:
- Standard Support (Self-Service)
- Premium Support (Self-Service)
- Full Service
Note: To view the full details of what each of the service levels offer please go to this tutorial.
Note 2: If you are on an All Access plan, this page may be skipped because your wall will be created with that plan’s service level automatically. For example, our All Access Enterprise plan creates walls in the Premium Support level for all events.
After choosing your service level, click the Next Step button to proceed to the next page.

Step 5: You will be redirected to the Content page where you can add content source onto your wall. The following are the content sources you can add:
- X, formerly known as Twitter
- Tiktok
- SMS/MMS
- Everwall Direct (Web Form)
- RSS
- Slack
- Discourse
- Webex
- Everwall Connect
Note: To view what we support for each of these content sources please go here.

Step 6: After choosing the content source, you will be redirected to the design page where you can choose and customize the layouts, background, post appearance and configure the leaderboards.
When you’ve finished designing your wall, you can click the checkout button if you want to purchase it now, or click Save for Later if you are not yet ready to purchase the wall.

Still have questions? Get in touch.