Setting Up Ping Identity for Everwall SSO
If you are on our All Access for Enterprise, All Access for Agencies, or our All Access for Education plan you can use Single Sign-On as a login method for Everwall. To enable this you will need to work with your Account Manager to set things up on our end, however, before you can do that you’ll need to set up your SSO provider to support Everwall. Everwall supports any SSO provider that uses the more modern OpenID Connect Standard (also called OIDC) framework for Identity Management.
Below we’ll go through the process for one of the more popular SSO providers, Ping Identity.
Creating an Application in Ping Identity
Step 1: After logging into your Ping Identity account, in the left menu, select Connections, and then click Applications. Finally, click the + icon next to the Applications heading.

Step 2: In the fly-out modal that appears, add “Everwall” as the Application Name, optionally add a description and our icon, and then click OIDC Web App from the Application Type section. Finally, click on the Save button to save it.

Step 3: After Saving the settings from Step 2, you’ll be sent to an Overview page. On this page, click the Edit / Pencil icon.

Step 4: Enter our website address into the Home Page URL field. Unless your organization has a specific Signon URL within Ping Identity, you should leave the Signon URL blank. Then click on Save at the bottom of the screen.

Step 5: After Saving, click on Configuration, and then the Edit / Pencil Icon.

Step 6: On the Edit Configuration screen, leave all settings the default, except for entering our Redirect URI, which is https://account.everwall.com/sso/enterprise/finish, and then changing the Token Endpoint Authentication Method to Client Secret Post. Once you’ve made these two changes, click on Save.

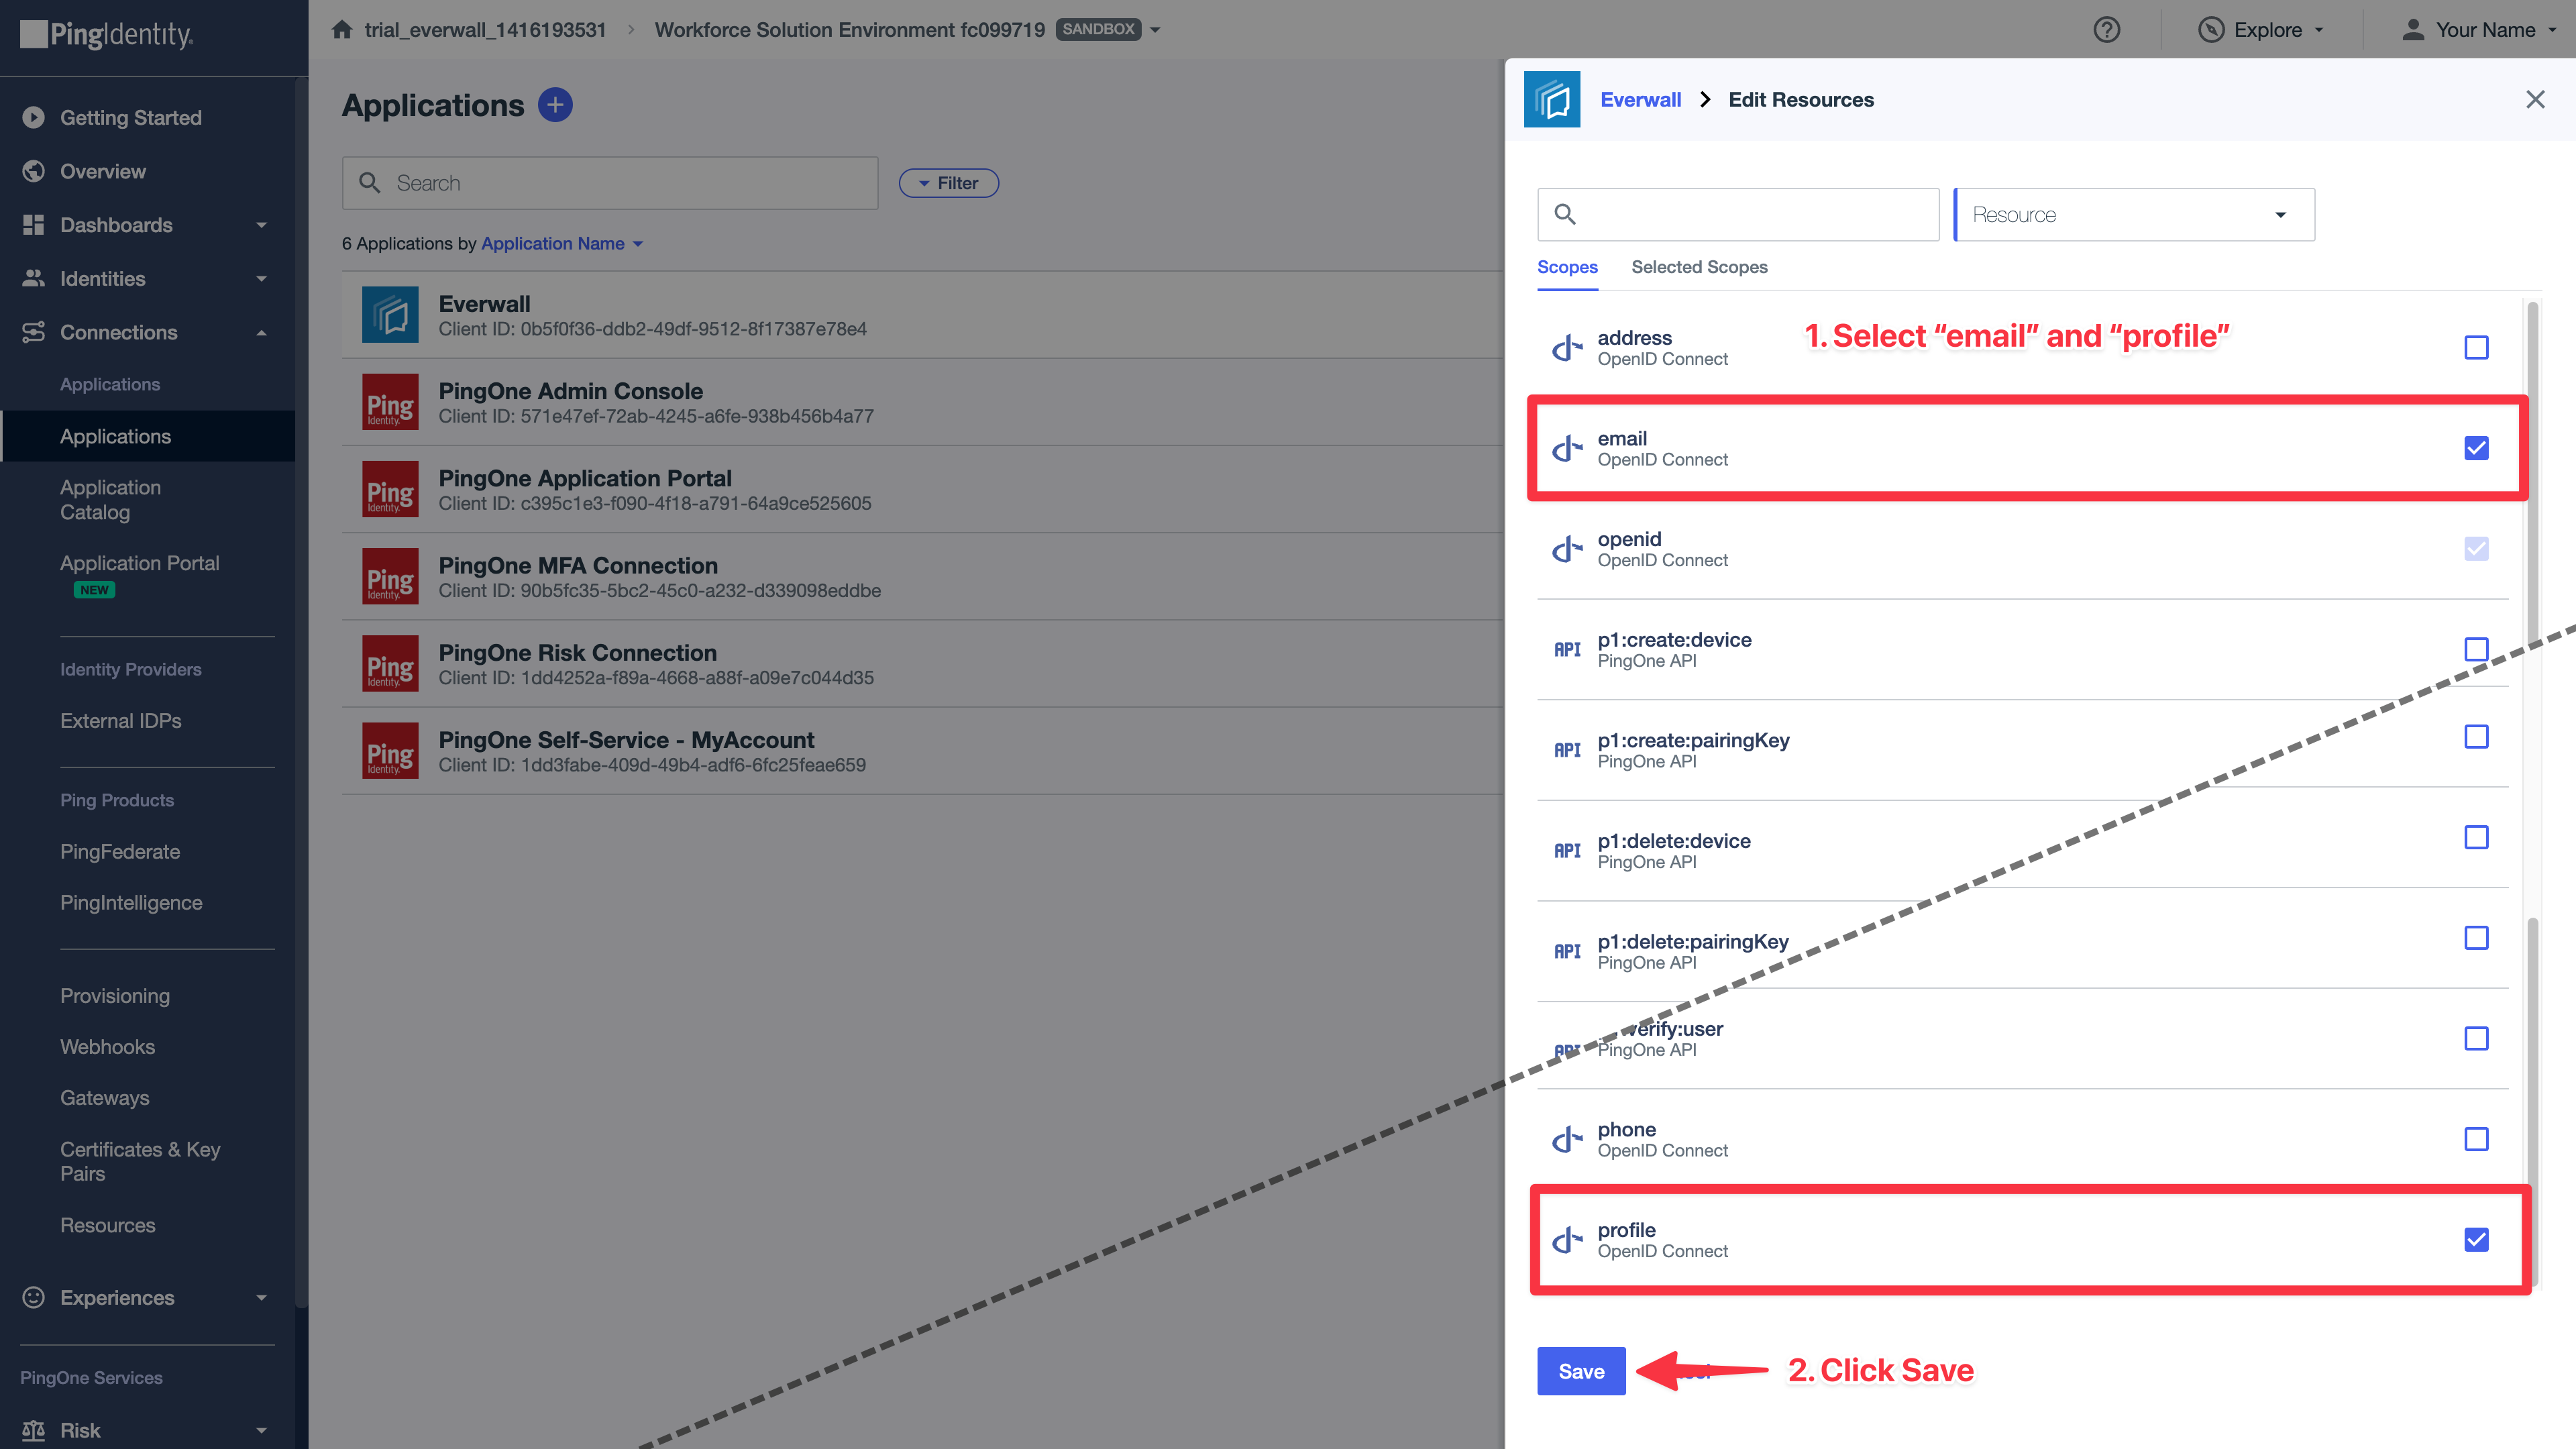
Step 7: Click on Resources, and then click on the Edit / Pencil icon.

Step 8: From the list, check Email and Profile. The openid setting is always granted, so will be checked and disabled. After checking those two options, click on Save.
Step 9: Click the toggle switch at the top of the screen to allow people within your organization to log into Everwall.
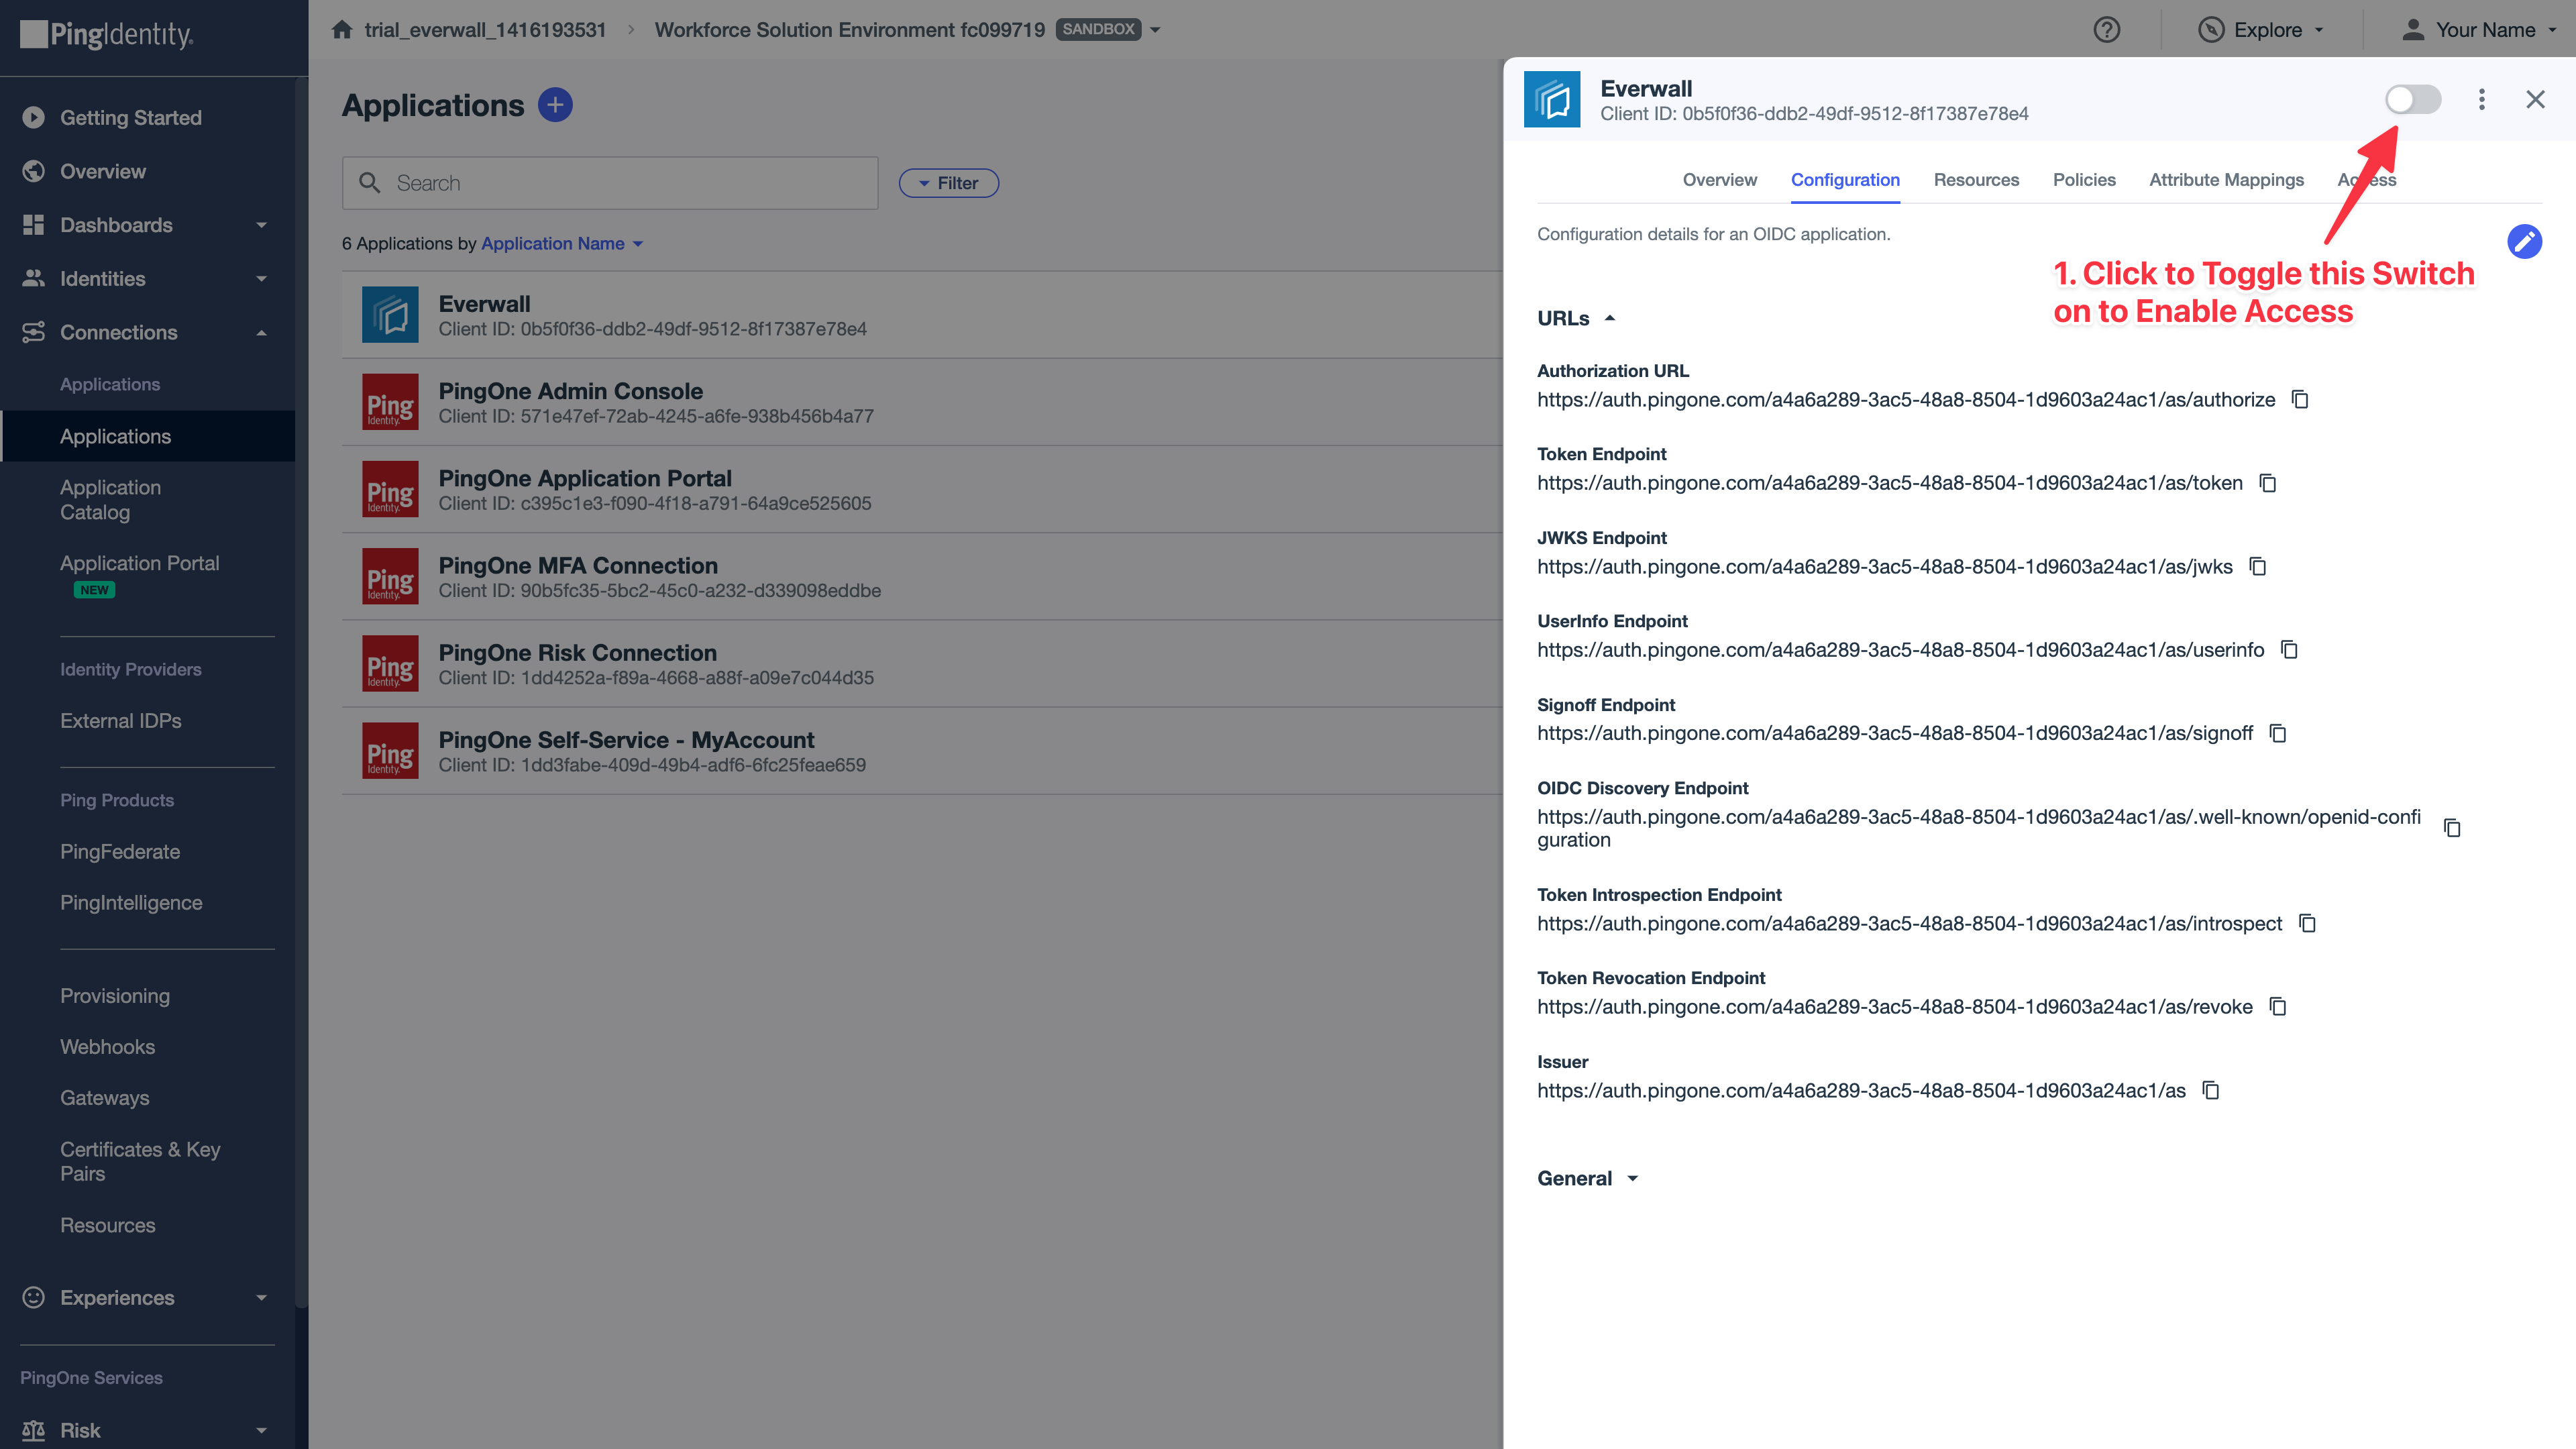
Step 10: Gather the settings Everwall needs to enable logging in with SSO on your account. To get these details, navigate back to the Configuration page.
By default, the General section is minimized, so you’ll need to expand it to see the Client ID and Client Secret.

We need the following items from the Configuration page:
- Authorization URL
- Token Endpoint
- UserInfo Endpoint
- OIDC Discovery Endpoint
- Client ID
- Client Secret
Once you have this information, you can send this to your Everwall account manager, and they can enable SSO on your account for you.
Still have questions? Get in touch.