Social Wall Design Options
While we try to make our social wall’s initial design beautiful by default, we do provide the ability for you to change almost anything on the design when you’re building your social wall. By customizing the design of your social wall, you can ensure that your social wall matches the branding of your overall event.
To customize the design for your social wall, you’ll go through the following steps:
- Pick a Layout
- Customize Title Bar
- Customize Wall Background
- Customize Post Appearance
- Configure Leaderboards and More…
While there are quite a few items that you can customize, please keep in mind that you do not have to do all the customization in one sitting or before you purchase the social wall. You can continue to edit the design of your social wall after you’ve purchased it, and even during your event if you need to.
NOTE: If you have previously created a design that you want to use again, or if you’ve have Everwall create a custom template for you, we’ve created a tutorial that explains how to apply it to an existing social wall.
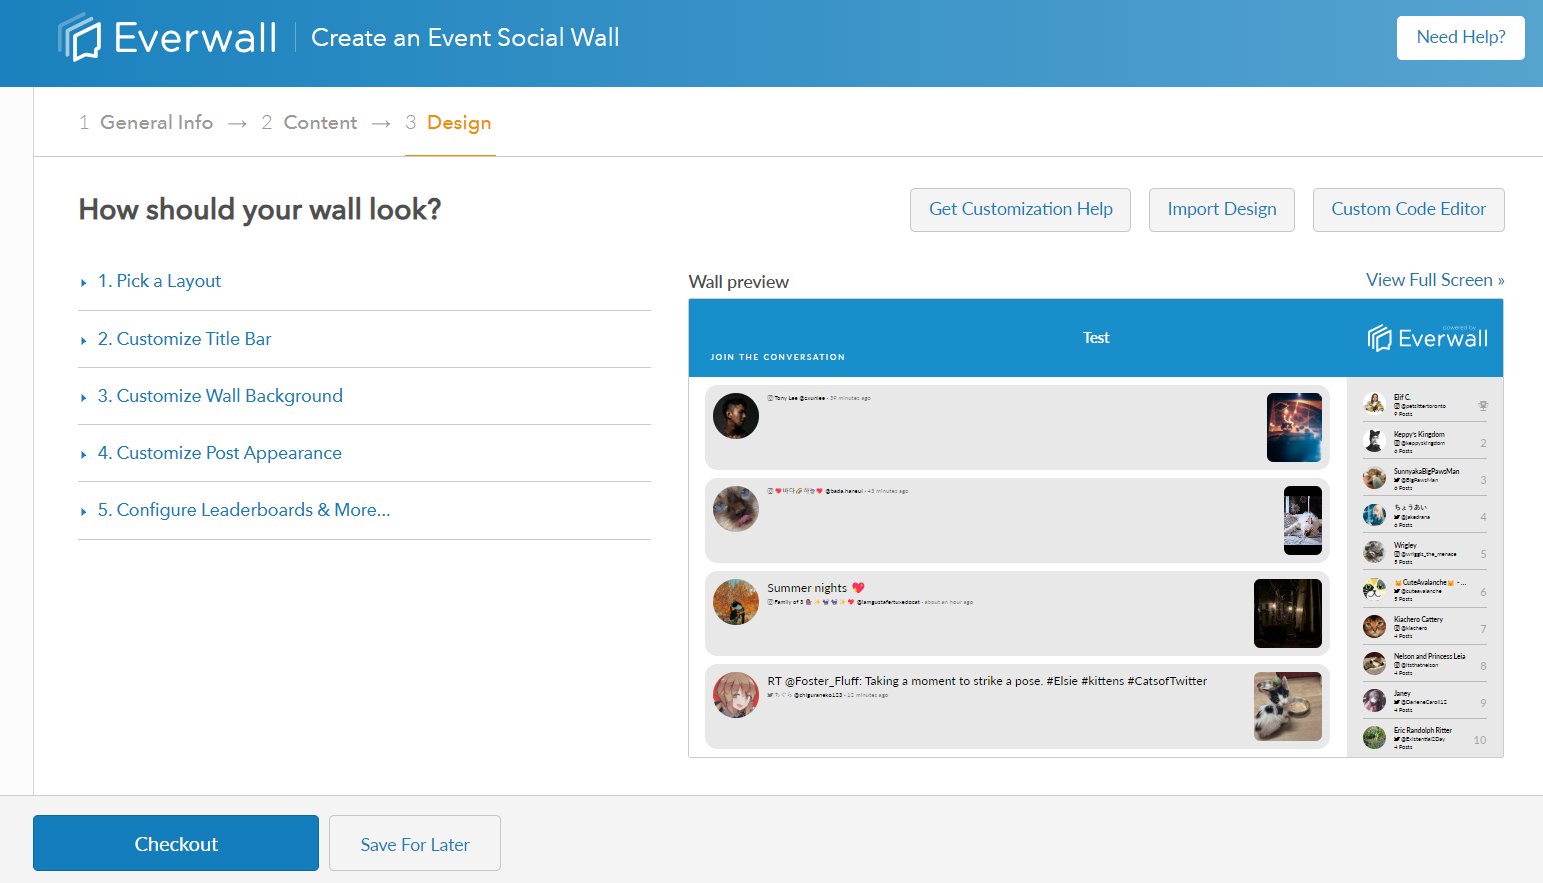
1. Picking a Layout
Choose the type of layout you want for your social wall. You can filter whether you want to see Landscape or a Portrait layouts.
As you change the layout, you’ll see that on the right you’ll have a preview. After each change you can click on it to reload the preview and see how it’ll look and function before it is displayed publicly.
| Example | Name (Format) | Description | Orientation |
|---|---|---|---|
| Classic Waterfall | New posts slide in from the top and move vertically down the screen. Not ideal for image-heavy walls since the photos are not that large. Works well for both landscape, or portrait screens. For portraits, we recommend that you go without the leaderboard. | Landscape | |
| Classic Widescreen (Leaderboard Right) | New posts slide in from the left in one of two tracks and move horizontally across the screen and slide behind the leaderboard (if enabled). | Landscape | |
| Classic Widescreen (Leaderboard Bottom) | New posts slide in from the top and move vertically down the screen. Not ideal for image-heavy walls since the photos are not that large. Works well for both landscape, or portrait screens. For portraits, we recommend that you go without the leaderboard. | Landscape | |
| Classic Single Post | New posts slide in from the left and push the current post off screen. Only one post shows at a time, which makes this a great option for doing Q&A (enable full moderation, and use that for determining which posts are shown). | Landscape | |
| Multi-column Waterfall | New posts slide in from the top into one of the available columns (you can decide to have anywhere between 4 and 8 columns) and they move vertically down the screen until pushed out of view. | Landscape | |
| Feature Me | New posts slide in from the top into one of three tracks (two if using a leaderboard) and move vertically down the screen. Posts with images have a higher chance of appearing in the featured—and much larger—track. | Landscape | |
| Triple Column | New posts slide in from the top and move vertically down the screen in one of three columns (two if a leaderboard is enabled). | Landscape | |
| Quad Canvas | New posts slide in from the top and push existing posts off in one of four columns. Ideal for image-heavy walls. Does not support leaderboards. | Landscape | |
| Chromakey Ticker | A classic news ticker at the bottom of the screen with a green background. This layout is meant for Chromakey applications (video, etc). Does not show any images, announcements, or leaderboards. | Landscape | |
| Chromakey Lower Third | A modern lower third layout with a green background. This layout is meant for Chroma Key applications (video, etc). Does not show leaderboards, but does show post images and announcements (unlike the Chromakey Ticker layout). | Landscape | |
| Webinar / Live Stream | A responsive layout that includes a webinar/video stream from Facebook Live, Twitch, YouTube Live, Zoom, or a custom embed from any other provider. Posts are displayed to the right of the video. You can optionally include or exclude the leaderboard as well (edit it below in the Configure Leaderboards & More… section). | Landscape | |
| Single Canvas | New posts slide in from the top and move vertically down the screen in a single column. Ideal for image-heavy walls and is meant for portrait orientations. You also have to select the number of visible posts. | Portrait | |
| Great Portrait Column | New posts slide in from the top and move vertically down the screen in one, two or three columns. You can decide the number of columns. | Portrait | |
| Clean Slate | A completely blank slate. Meant for custom coded walls by us, or you. None of the design options below will be used if you go with this option. We can also build a custom template for you. For more information about custom templates that we can build for you, click here. | Portrait or Landscape |
2. Customize Title Bar
The “Title Bar” or header of a social wall often includes the name of the event, an event logo, and the event hashtag. It may also incorporate additional elements such as sponsor logos to reinforce branding and create a cohesive visual identity.
Follow the steps below to customize the Title Bar section of your social wall.
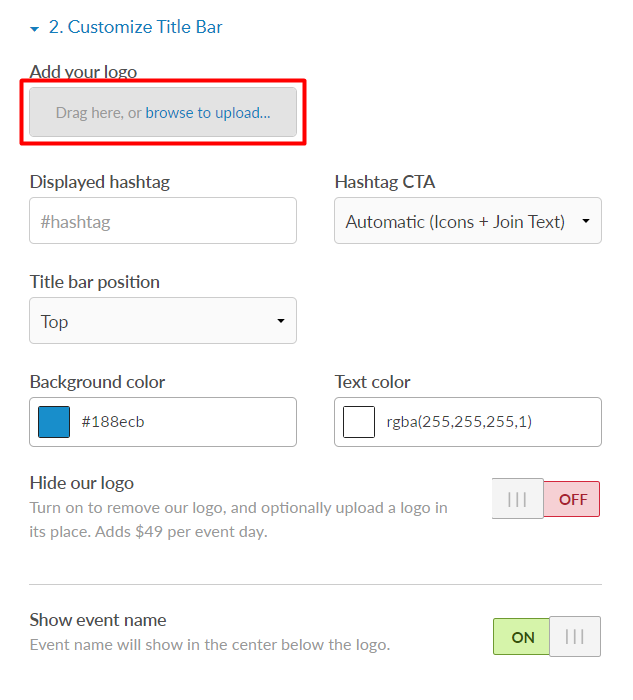
Step 1: If you wish to show your event’s logo or a company logo on the social wall, you can do so here. Uploading a logo into this spot is included at no cost.
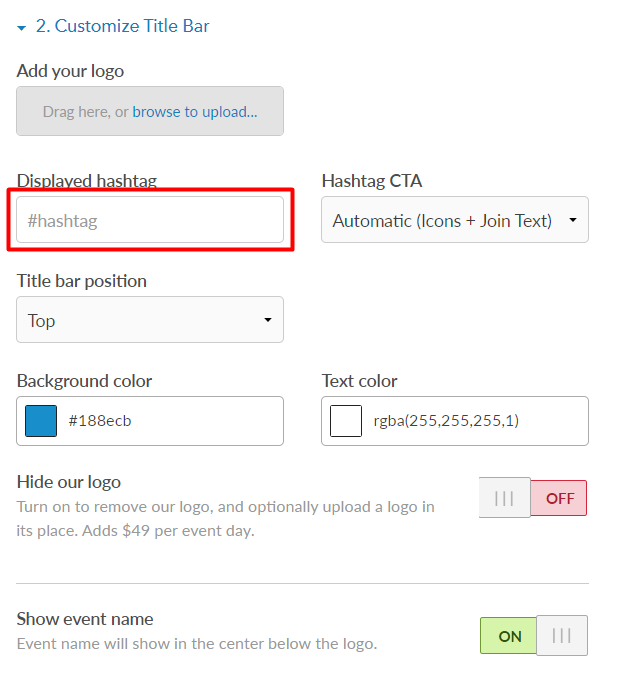
Step 2: Enter the displayed hashtag. The displayed hashtag should be your primary event hashtag that you want people to use. It is not automatically added from the terms you used on the Content screen so that you have full control and can monitor for more hashtags and terms than you’re displaying here. For multiple hashtags, put a semicolon between them and we’ll automatically fade between them.
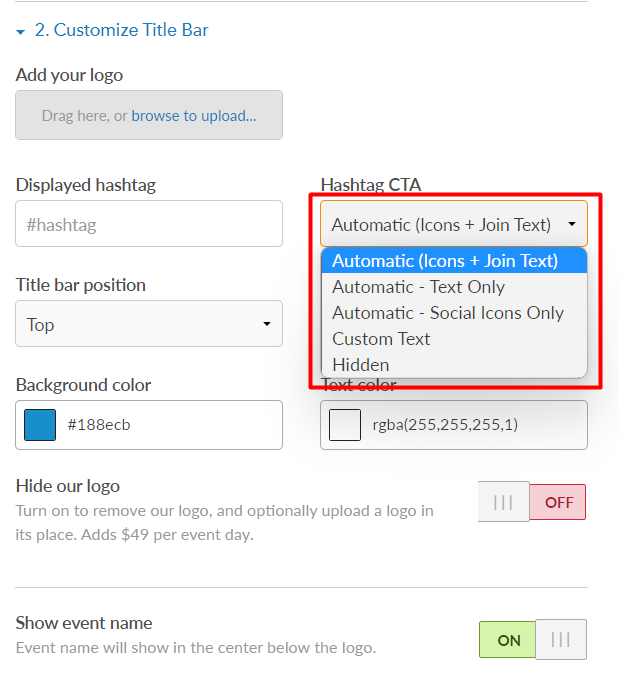
Step 3: Select the type of hashtag Call To Action (CTA) from the dropdown menu.
- The default is “Automatic (Icons + Joining Text)” and that will show the social icons for the networks you set up, and then a “Join The Conversation” text after it (or similar text in another language if you change the language). The icons are chosen by what you’ve configured in the Content Screen of the builder.
- Automatic – Text Only: This is just the “Join The Conversation” part without any icons.
- Automatic – Social Icons Only: This is just the social network icons, and they are chosen by what you’ve configured in the Content Screen of the builder.
- Custom Text: When selected a text box will appear and you can freeform type any text you’d like. This can be helpful for SMS and other networks where you might want to explain it.
- Hidden: This just hides the CTA section. The hashtag above will then become vertically centered in the Title Bar. It can also be helpful if you don’t want any instructions to appear at all—you’d just select this hidden option, and then make sure the Displayed Hashtag is left empty, and the entire section would be empty on your social wall.
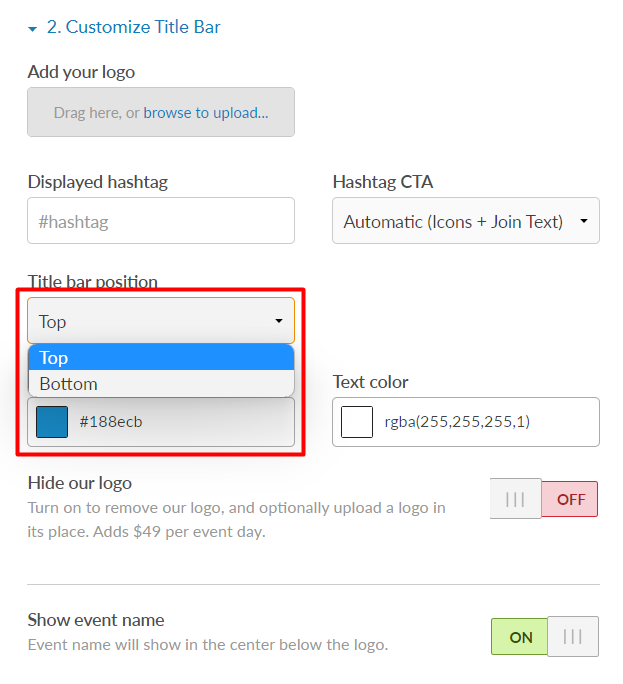
Step 4: You can have the Title Bar be shown at the Top, Bottom, Left, or Right side of the screen depending on the layout you’ve chosen. In the example below, the layout supports Top or Bottom only.
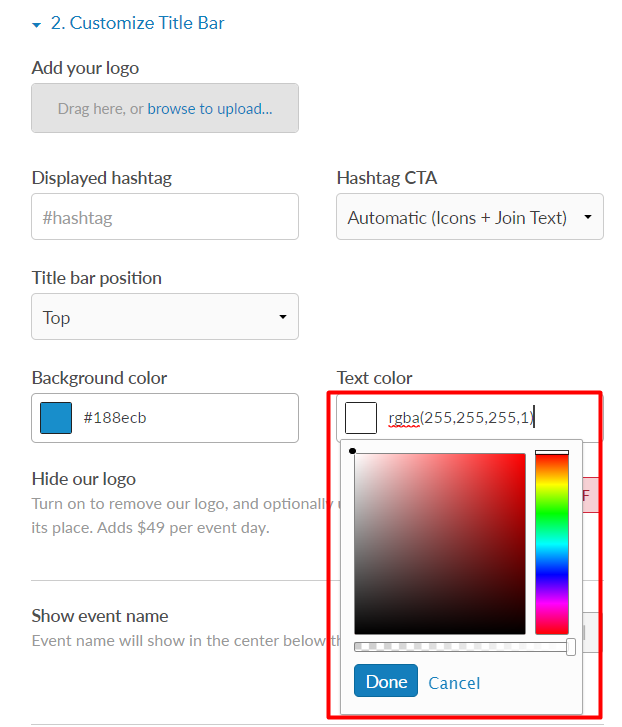
Step 5: Choose the background color of the Title Bar. You can edit the RGBA value by typing it into the field, you can paste in a Hex value, or you can choose from the color picker. If you choose a color from the color picker, click “Done” to save it.

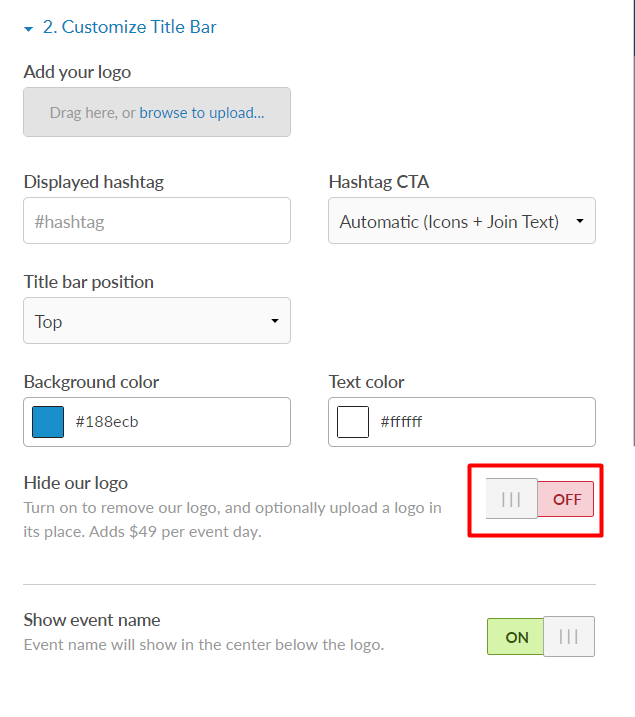
Step 7: You also have the option to hide our logo and optionally replace it with your logo. Enable/Disable the “Hide our logo” toggle to hide/show the logo.
Note: There is an additional $49/event day cost to remove the Everwall logo from the Title Bar, unless you are on an All Access plan (removing our logo is included free if you’re on an All Access plan)
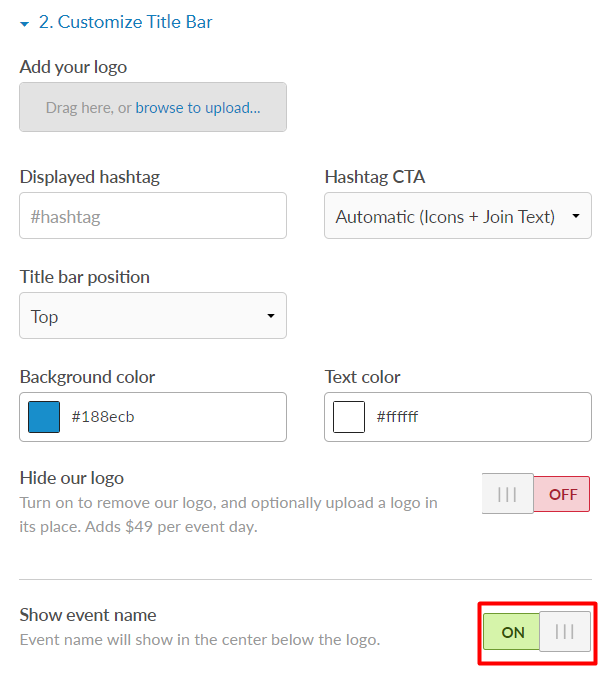
Step 8: By default, below the event logo and in the center of the Title Bar, we show the event name (which you set on the first step of the builder). If you do not want to show the event name below the event logo, then turn this toggle off.
3. Customize Wall Background
Customizing your social wall’s background allows you to incorporate your brand colors, logos, and visual elements. This creates a unified and professional look that aligns with your overall brand image.
Follow the steps below to customize the wall background of your social wall.
Step 1: You can choose the background color of the social wall by entering a Hex or RGB value into the field, or you can choose from the color picker. If you choose a color from the color picker, click “Done” to save it. There is no transparency option for the social wall background.
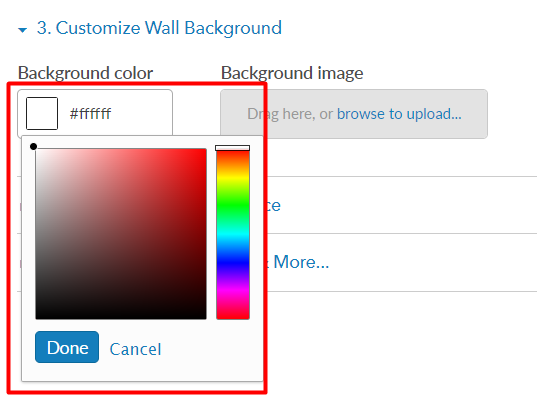
Step 2: You can also set a background image by uploading an image into the Background Image area. If you add an image, it will overlay the background color you provided in the Background Color field.

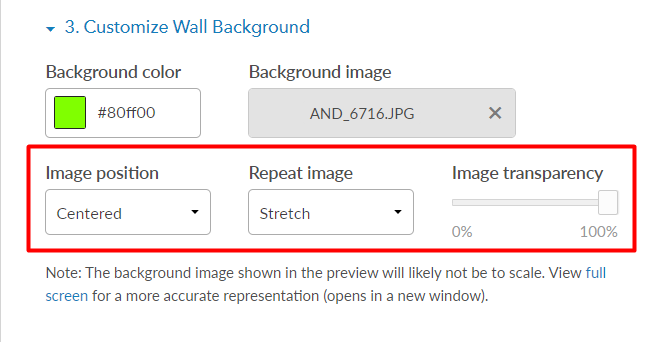
Step 3 (only if you’ve uploaded a background image): After an image has been uploaded, several options will appear for positioning that background image.
- Image Position: Top Left, Top Right, Centered, Bottom Left, Bottom Right
- Repeat Image: No Repeat, Repeat, Repeat X, Repeat Y, and Stretch
- Image Transparency: 0-100%
For most Social Walls with a background image, we recommend an Image Position of Centered, and a Repeat Image of Stretch.
Note: For best results, we recommend creating a background image that is the same resolution as the screens you’ll be showing the social wall on. Most landscape screens are 1920×1080, but may also be 1280×720 or 3840×2160. If you’re using portrait screens, then 1080×1920 would be the most common.
4. Customize Post Appearance
Modifying your post appearance allows you to apply your own visual styles to the posts. You can define the font family, font sizes, colors, and background elements that best suit your brand or event. Social media posts often contain various types of media, such as images or GIFs, and this section allows you to control how these media elements are displayed within the post.
Follow the steps below to customize the post appearance on your social wall.
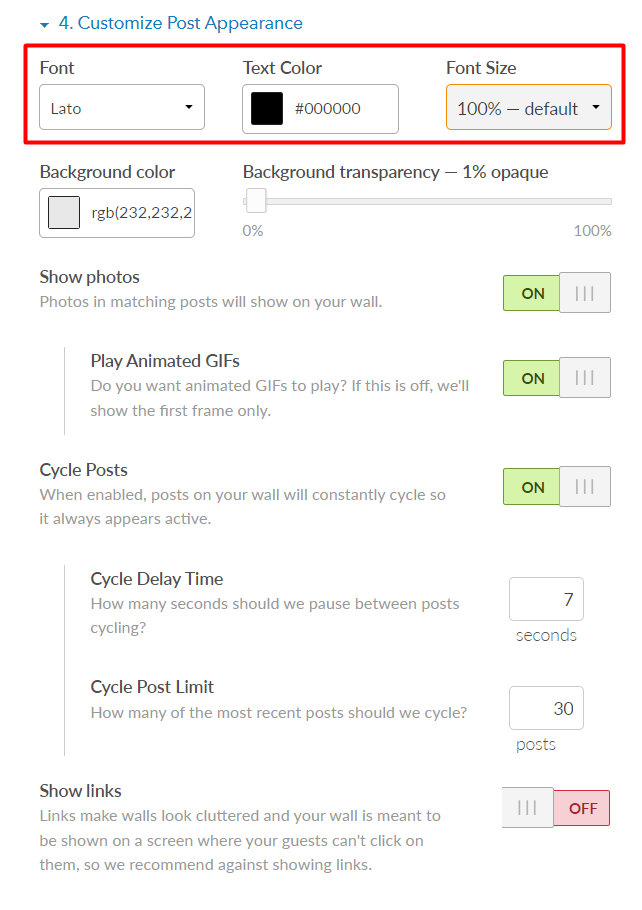
Step 1: Select the font family, font color, and font size from the dropdown menu.
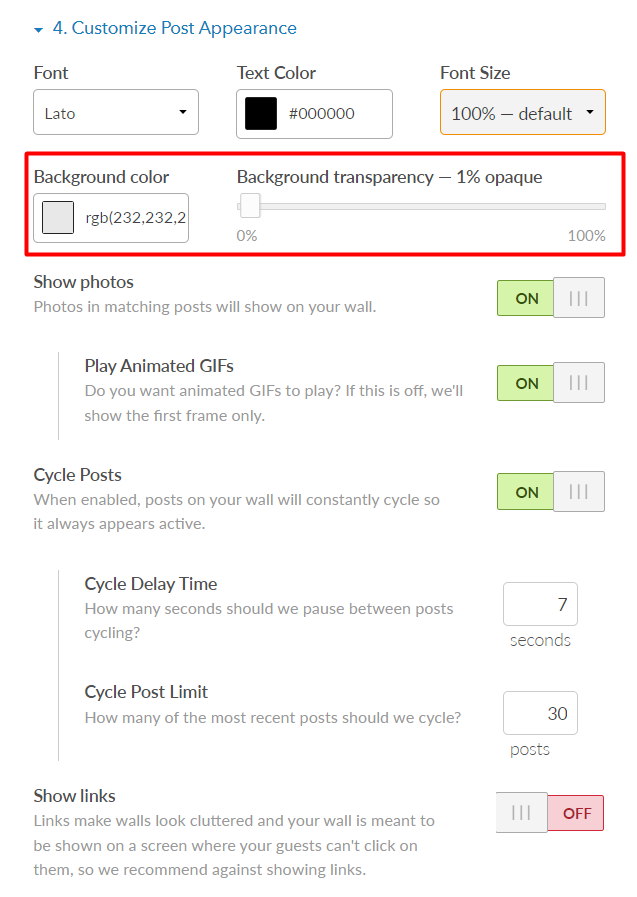
Step 2: To set the Background color, you can enter the Hex, RGB, or RGBA color code, or choose from the color picker that appears. You can also adjust the opacity (transparency level) of the background of the social media posts.
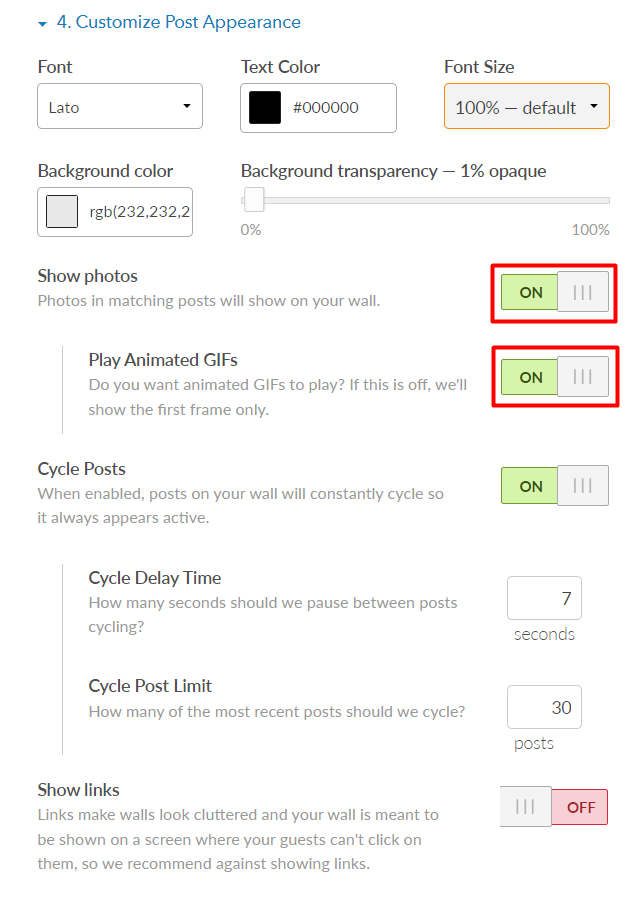
Step 3: By default we show photos that are included in Posts. If you do not want to show photos on your social wall, disable the “Show photos” toggle to hide the photos. We also allow animated GIFs and videos to play by default, however you can disable animated GIFs from playing by toggling this off. If the switch is off, the first frame of the GIF or video will be displayed.
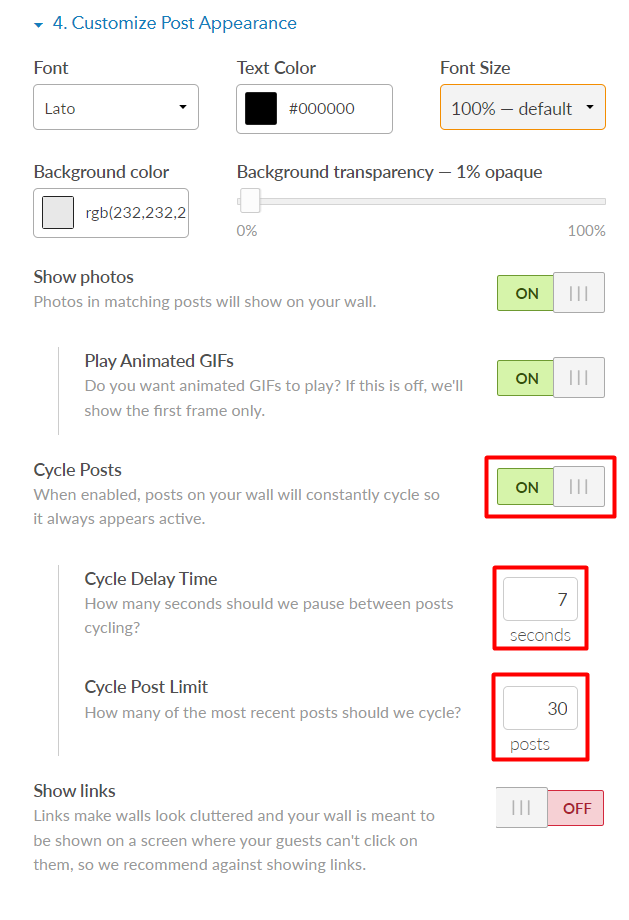
Step 4: Post cycling is an option that’s enabled by default to make your social wall always feel active, even if new posts are not coming in. If the Cycle Posts toggle is enabled, every X seconds we’ll cycle an old post that’s not currently visible on the screen so that it’s visible again.
You can control how often we cycle posts in the Cycle Delay Time setting. In the example below, every 7 seconds, if no new posts have come in, it’ll take an older post not currently visible on the screen and show it again on the screen.
The Cycle Post Limit controls the number of posts that are displayed on your social wall. With it set to 30 in the example below, we’ll always be cycling the most recent 30 posts on your social wall. You can set this number to be up to 250, however we recommend keeping it around 30.
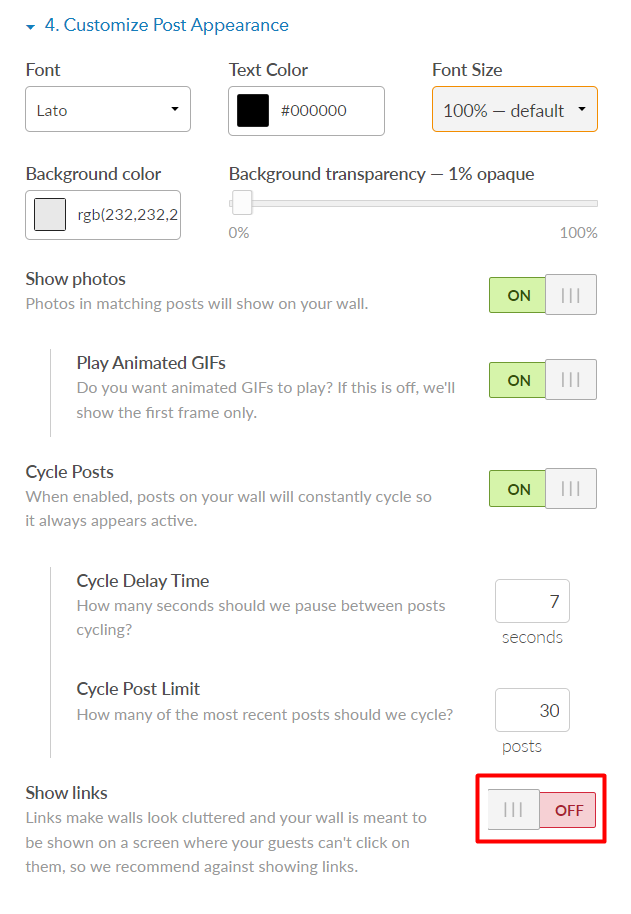
Step 5: The Show links toggle determines if URLs that are included in posts are displayed on the social wall. We recommend leaving this toggle off so that the links are not displayed, since a social wall is not meant to be directly interacted with. By leaving this off you’ll have a cleaner and more streamlined appearance, allowing the focus to be on the content of the posts rather than the URLs.
5. Configure Leaderboards and More…
This section allows you to customize the social wall’s language, and to show a leaderboard to enhance engagement which provides a more interactive experience for your audience.
Follow the steps below to configure the leaderboards on your social wall.
Step 1: Enable the “Show leaderboard” toggle to display the leaderboard on your social wall. Otherwise, Disable the “Show leaderboard” toggle to hide the leaderboard.
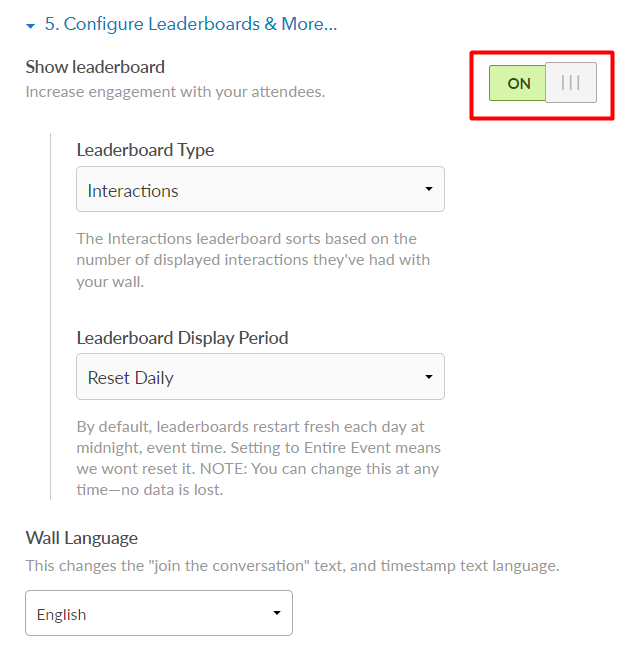
Step 2: If you have chosen to show a leaderboard on your social wall, choose the leaderboard type you want to use from the dropdown menu.
You can choose from 4 leaderboard types:
- Engagement Leaderboard – This leaderboard counts replies and reposts of posts that are shown on your social wall, and it’s designed to encourage people to get other people to reply to or to repost posts that are using your event’s hashtag. The leaderboard is only recommended if you’re only using X (Twitter) or Bluesky as a content source.
- Interactions Leaderboard – The Interactions leaderboard counts the number of times that an individual has had a post appear on your social wall. Each time a post is approved to be shown on your wall, their count will increase by 1. This leaderboard supports all of our content sources, such as X, Bluesky, and Instagram, and is the recommended choice for most events.
- Followers Leaderboard – The Followers leaderboard looks at the number of followers a person has, and ranks them by that number. Currently, only Twitter and Bluesky shares this data with us, so this leaderboard is only useful if your social wall uses one of these as its main content source.
- Custom Leaderboard – Custom Leaderboards are our newest edition of leaderboards, and with it you control exactly how users are ranked. Since you are in full control, you can enter the names, usernames, and values to rank them. Most events that use this leaderboard type are doing contests outside of Everwall, and then use this option to reflect the current rankings on their social walls.
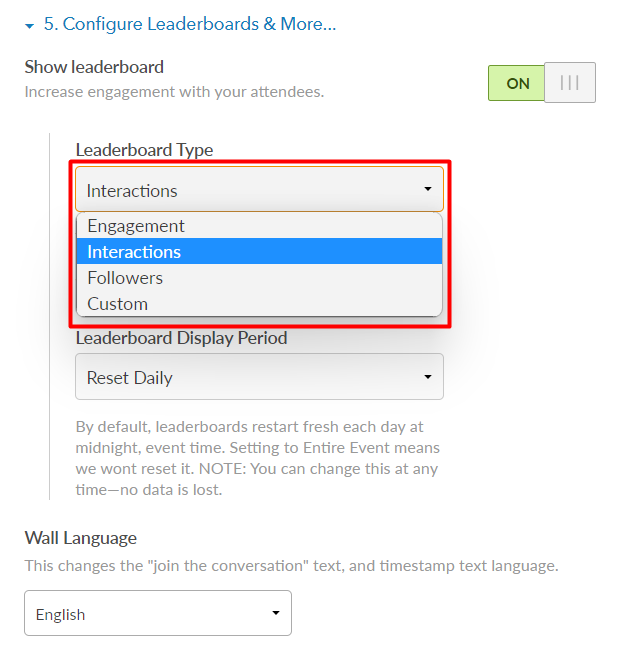
Step 3: Choose the Leaderboard Display Period from the dropdown menu. By default, leaderboards restart fresh each day at midnight (as defined by the timezone you configured in Step 1 of the Builder). Setting it to the Entire Event means we won’t reset it each day.
NOTE: You can change the leaderboard settings at any time—no data is lost.

Step 4: Choose the social wall’s language.
Posts can be in any language at any time. This setting only affects the post timestamps, the default “Join the Conversation” call to action in the Title Bar, and various headings, like the Leaderboard or Polls. If you have enabled Everwall Direct so people can post directly to your social wall, the web form field names will also be changed to be in this language.
Additionally, if you have multiple social walls and you need some to be in one language, and others to be in other languages, you can manually override the language on a screen-by-screen basis.
6. Save Your Changes
Now that you have customized everything, you can save your changes by clicking on the Checkout Button (if you haven’t purchased it yet) or the Save For Later button. If you have already purchased it, the buttons change to Save and Save and Close. There is also a Cancel button that appears and you can click that if you want to exit without saving.

Still have questions? Get in touch.