How to Change a User’s Permissions
Everwall allows you to precisely manage access levels for each person you’ve added to your account. You can grant full administrative privileges to certain users, giving them full control over all settings and features. Alternatively, you can restrict their access so they can only manage specific social walls you’ve defined for them, they can only moderate content on specific social walls, or you can completely restrict them so they have read only access. This flexibility ensures that each team member has the appropriate level of access based on their role and responsibilities.
The process for changing a user’s permissions is very similar to the process for when you add a user to your account.
How to Change a User’s Permissions
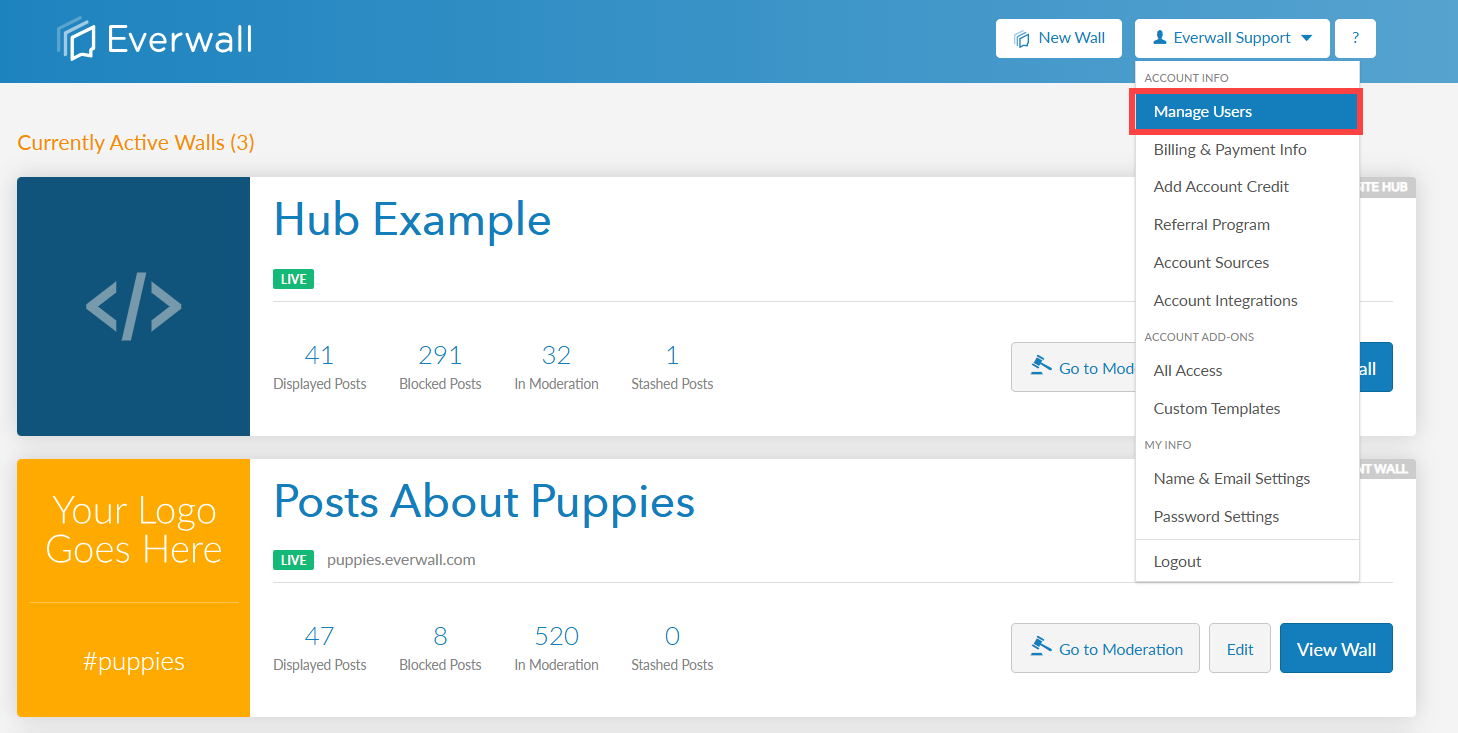
Step 1: Click your name in the top right of the page to show the account dropdown menu, then select Manage Users.

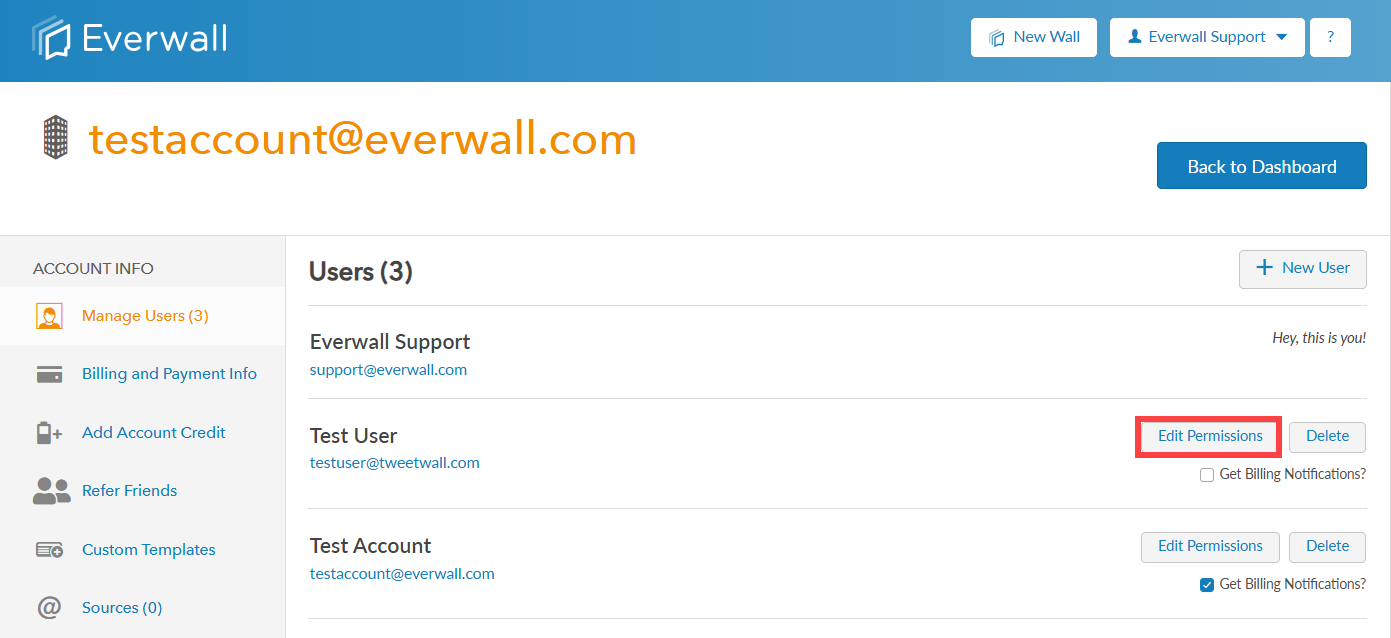
Step 2: You will see the list of users on that account. Choose which user you want to change the permissions on and then click the Edit Permissions button.

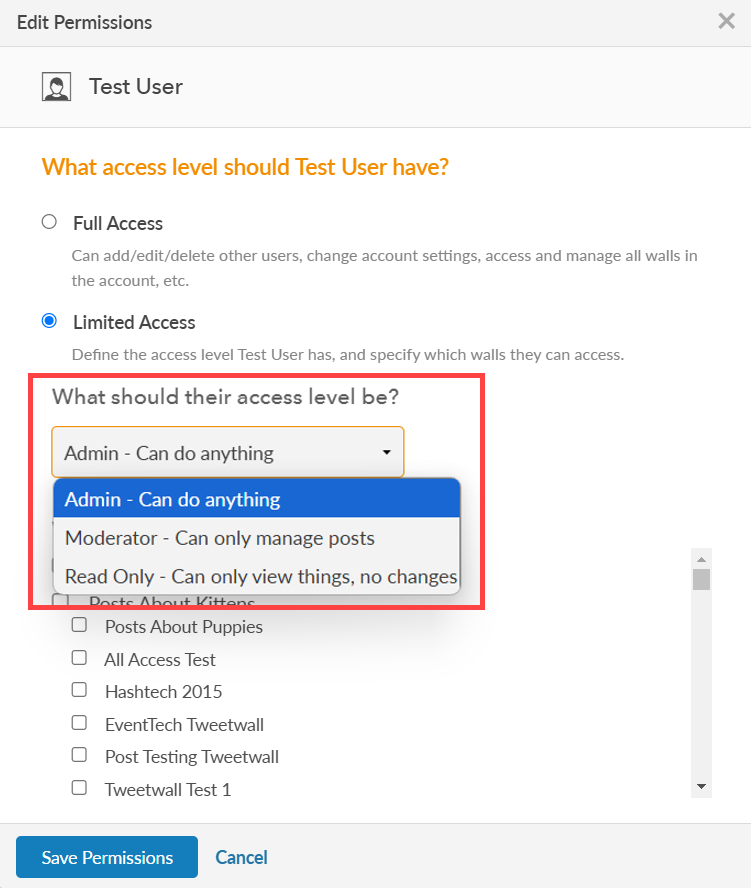
Step 3: Choose the access level for the user. With full access, they can add, edit, or delete other users (including you!), modify account settings like billing information, and access and manage all walls within the account. If you pick the Limited Access option, you will be able to specify the user’s permissions and set which walls they can access.

Step 4: If you opt to change their access level to Limited Access, you can specify the user’s permissions and set which walls they can access.
- Admin: Makes them an admin on that social wall—they will be able to change any setting related to that social wall, moderate posts, export data, and more.
- Moderator: They will not be able to make any changes, except to the content settings of the social wall. They will be able to move posts between queues, edit them, manually import posts, and export data.
- Read Only: They will not be allowed to make any changes to anything. They can export posts data, though.

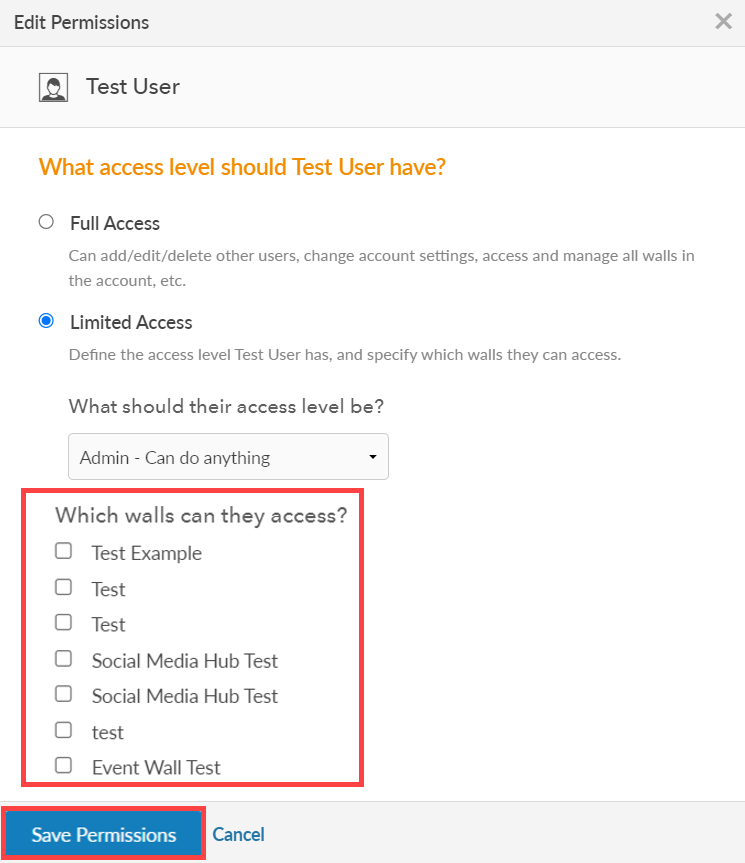
Step 5: When you set them to Limit Access, you must also select which social walls they can access. Simply click the check mark next to each wall you want them to have those permissions on and then click Save Permissions.
Note: If you create a new social wall after you’ve added a Limited Access user, that user will not be able to see the new social wall until you go back to this page and edit them, then check the box next to the new social wall.

Still have questions? Get in touch.