How to Enable or Disable Moderation
Enabling or disabling Full Moderation follows the same navigation steps. The only difference will be in the final step—the menu’s text will be different.
NOTE: After enabling or disabling moderation, it might take up to a minute for the change to take effect.
Additionally, it’s important to note that enabling or disabling moderation does not automatically affect the posts already present in the moderation or displayed queues. For instance, if you have 100 posts in the moderation queue and you choose to disable full moderation, those 100 posts will still remain in the moderation queue for you to manage. The change will only impact new posts received after the modification, provided they pass through your filters.
This tutorial will show you how to enable or disable moderation.
Step 1: Click on the Posts link in the left menu to go to the Posts page.

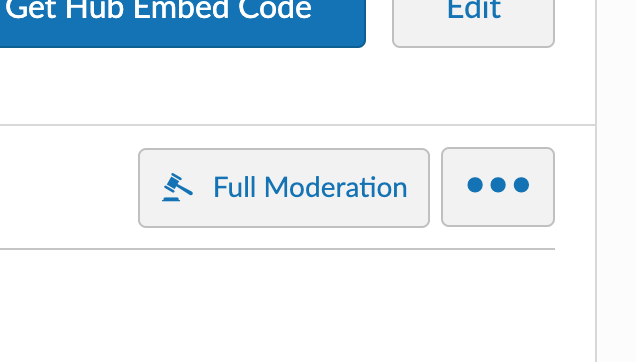
Step 2: From any queue, click the More button (it has three dots on it) to view the options.
Note: You can activate or deactivate full moderation from any of the Queue pages.

Step 3: Click on the Disable Moderation or Enable Moderation menu item.
Note: If you do not see either of those options, Full moderation may not be enabled/purchased for your Social Wall.

If moderation has not been purchased for your wall, a button will be next to the More button that says Full Moderation. To enable Post Moderation you will need to purchase it first. To do so, click the Full Moderation button next to the More button, and it’ll walk you through it.
Still have questions? Get in touch.