Moderation and Content Filters
Once a post is received, our first step is to assess it against the filters you’ve enabled within the Moderation and Content Filters configuration. If the post successfully passes these filters it will be displayed on your wall, unless you’ve enabled post moderation. If post moderation is enabled, incoming posts are directed to a moderation queue for a human to review it instead of it being shown instantly.
If you have chosen to enable post moderation, you can have unlimited moderators to help you moderate your wall, and they can perform their moderation tasks from any location with internet access.
This tutorial will show you how to manage moderation and content filters.
Navigating to the Moderation Settings and Content Filters:
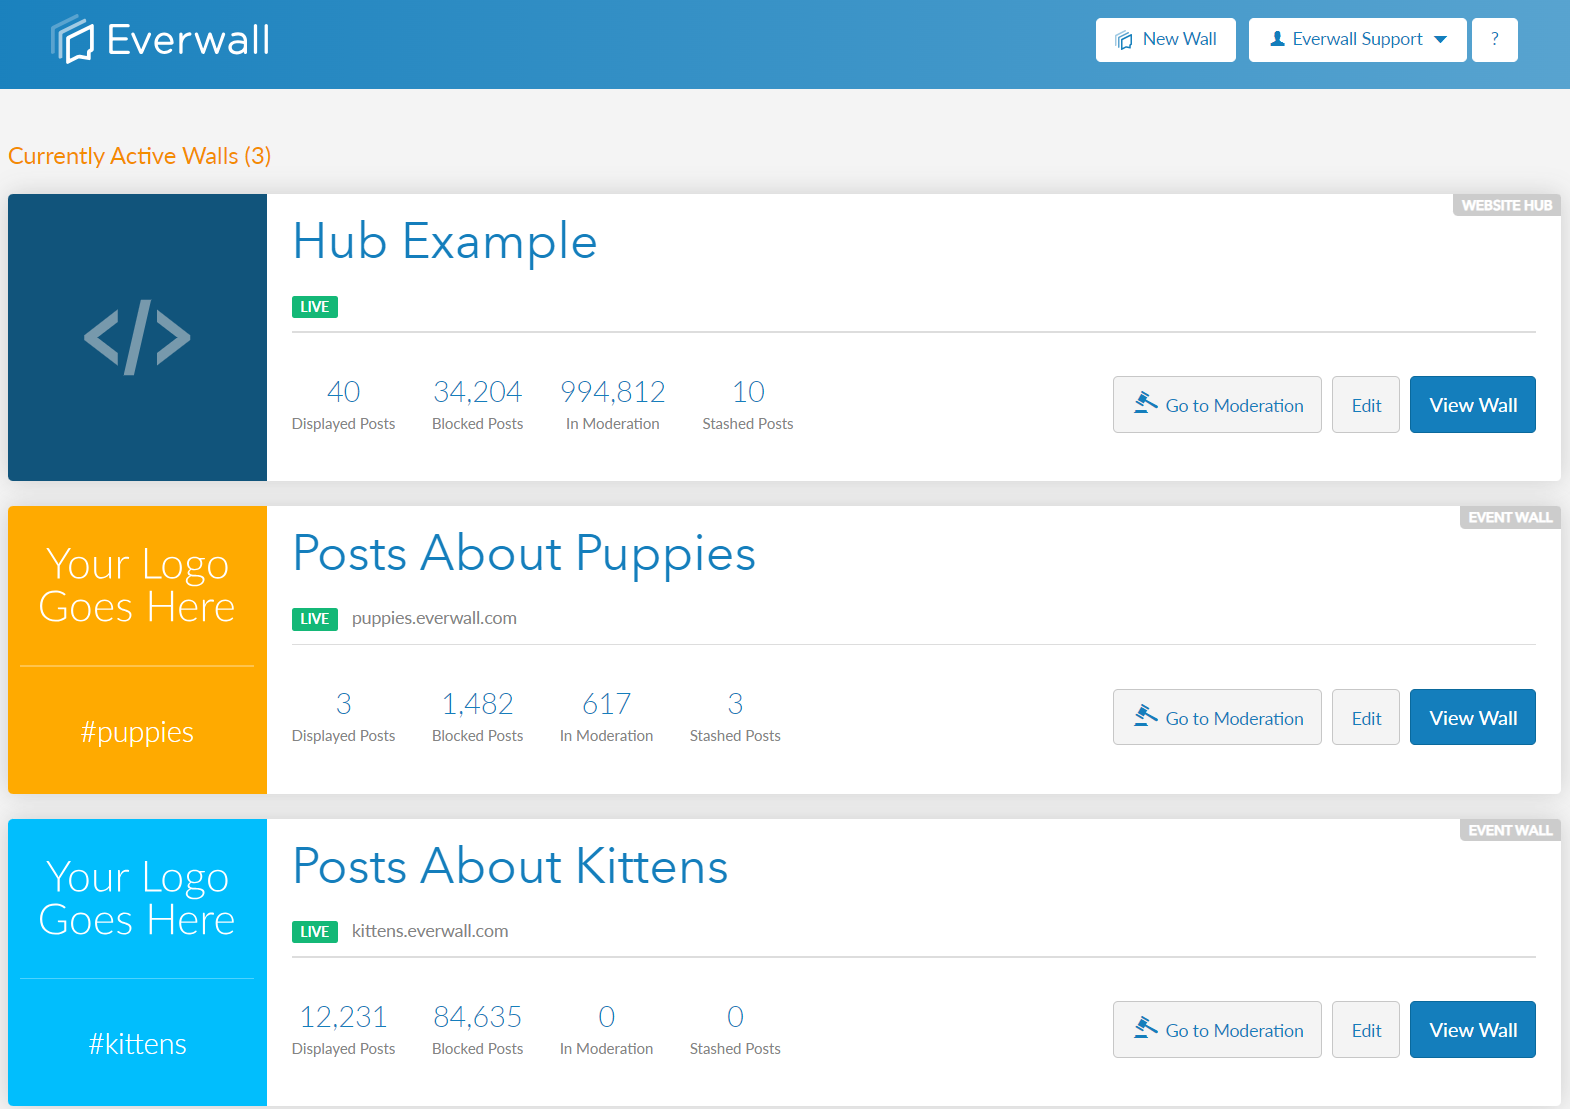
Step 1: Select which wall you want to access to edit, if you have more than one available to you.
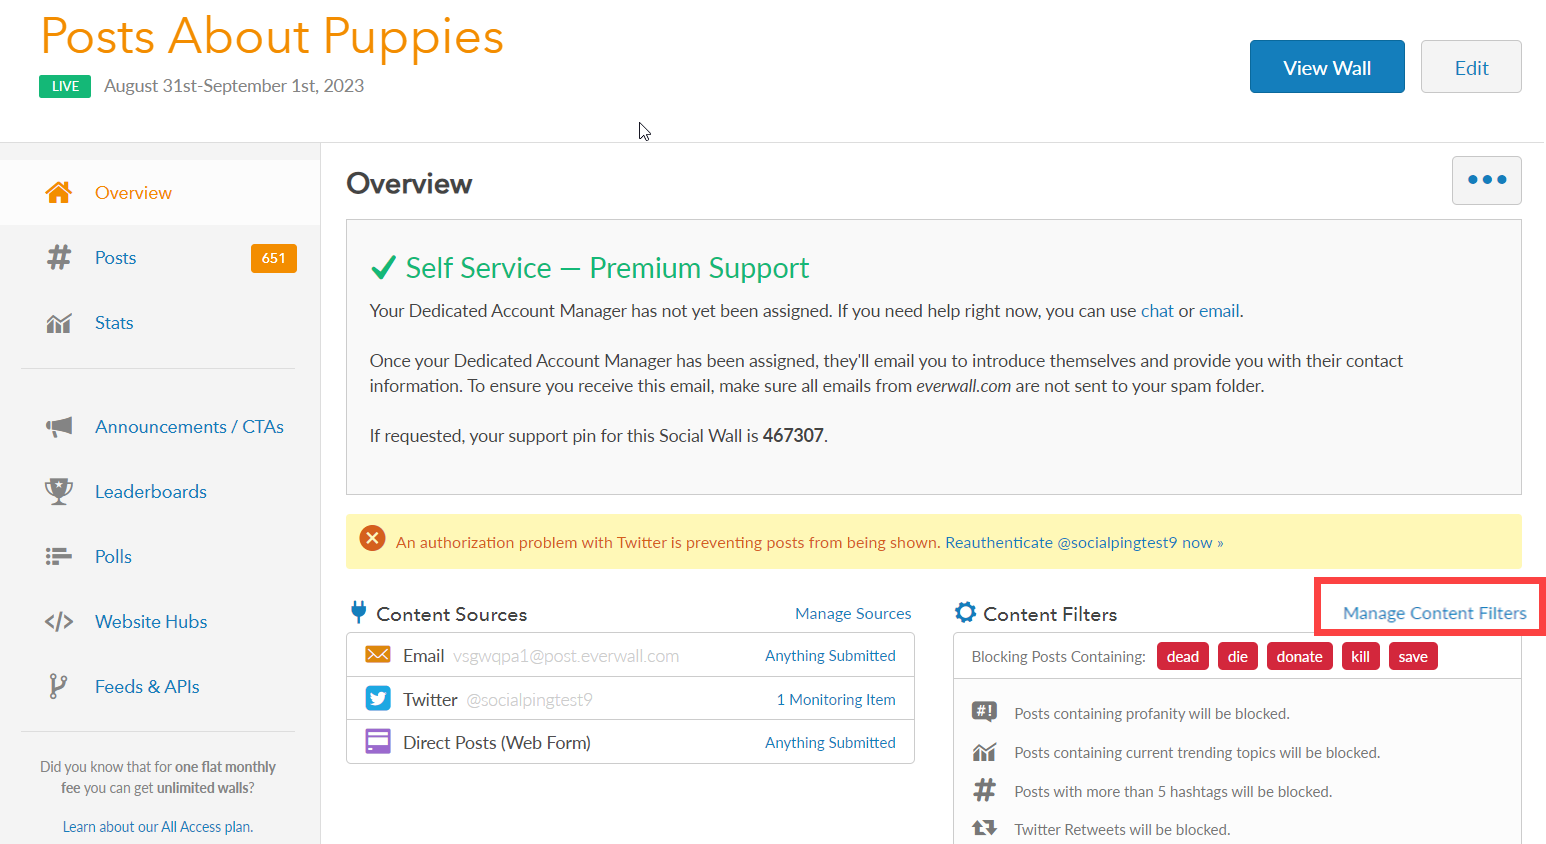
Step 2: On the overview page, go to the content filters section and click the Manage Content Filters link.
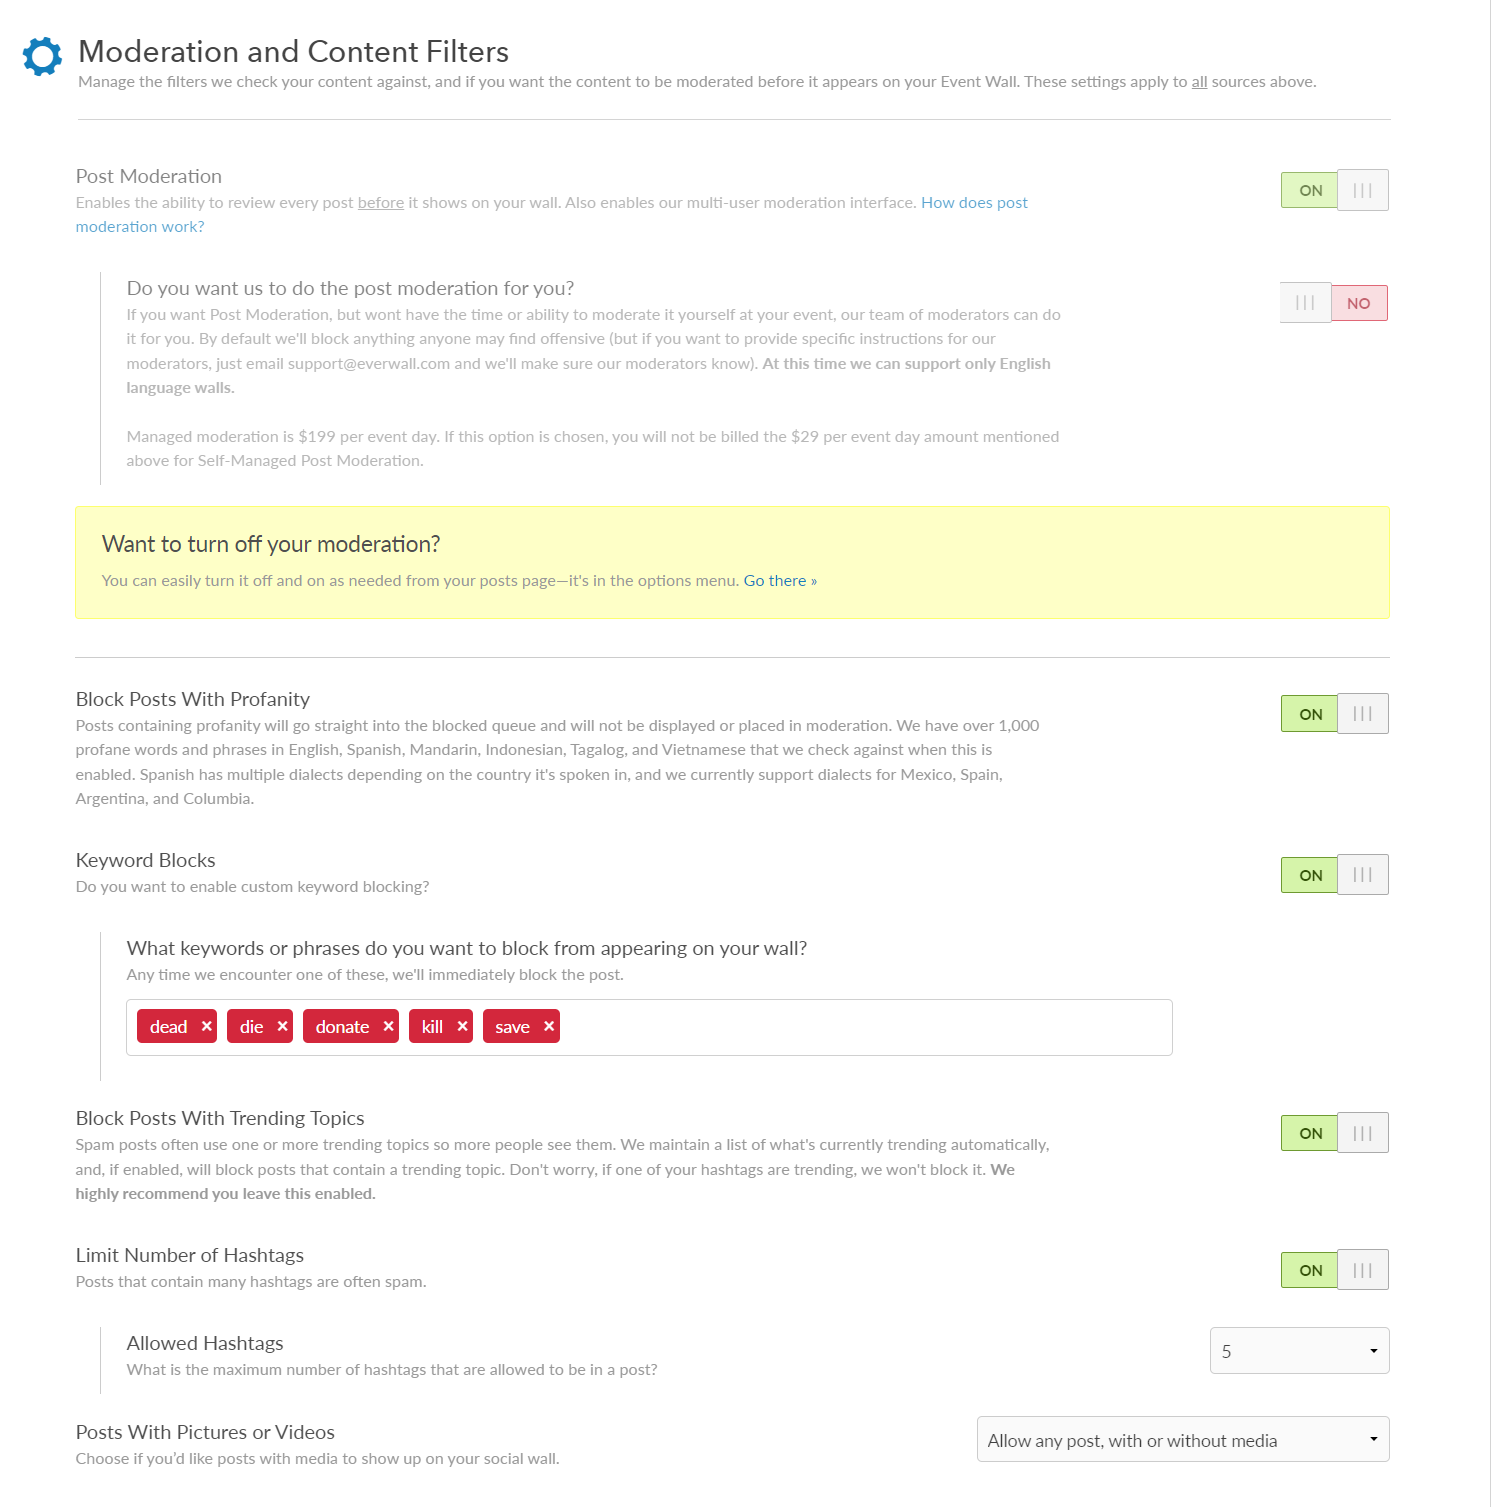
Step 3: You will be redirected to the Content page of the builder. Go to the Moderate and Content Filters section to modify the content settings.
Moderation Settings
Enable Moderation: Switch the toggle on to enable the ability to review every post before it shows on your wall. This also enables our multi-user moderation interface.

Managed Moderation: Enable the Managed Moderation toggle if you want our team of moderators to manage posts for you. By default we’ll block anything anyone may find offensive (but if you want to provide specific instructions for our moderators, just contact us and we’ll make sure our moderators know). At this time we can support only English language walls.
Note: Managed moderation is $199 per event day. If this option is chosen, you will not be billed the $29 per event day amount mentioned above for Self-Managed Post Moderation.

Post Filters:
Profanity Filter: Enable the toggle to block posts containing profanity. If a post is found to have profanity in it, the post will go straight into the blocked queue and will not be displayed or placed in moderation. Currently we have over 1,000 profane words and phrases that we check against in several different languages when this is enabled.
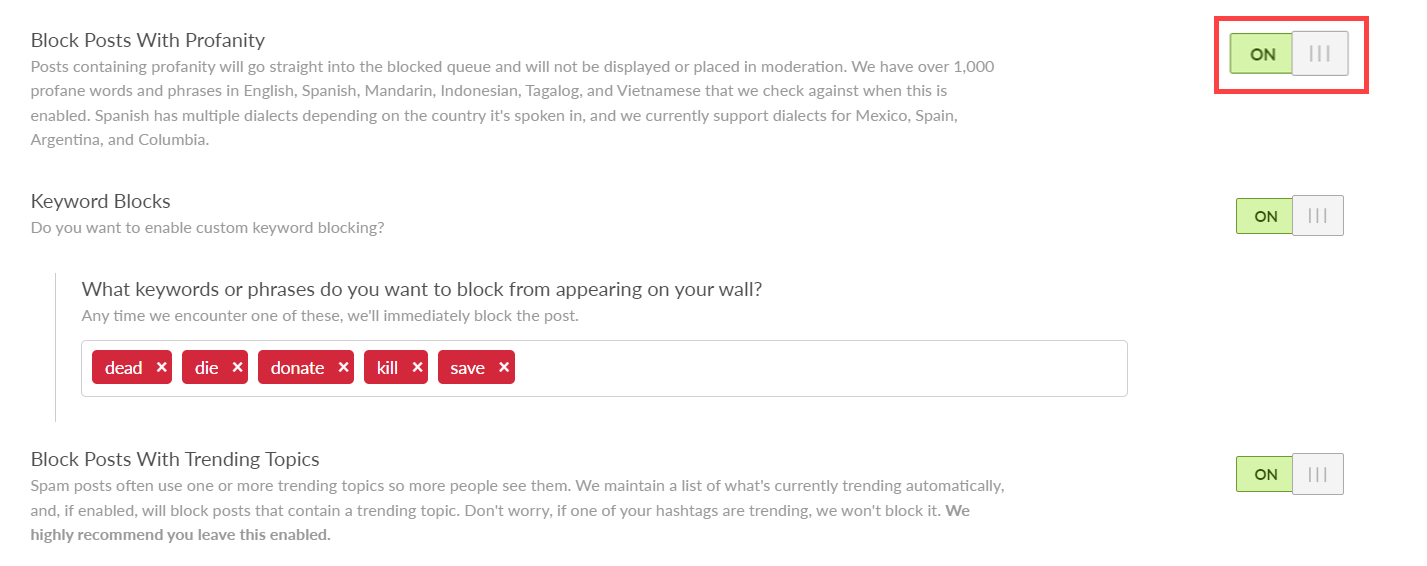
Keyword Block Filter: Switch the toggle to enable custom keyword blocking. If enabled, you can provide specific keywords that you want to block from your social wall and we will immediately block the post.
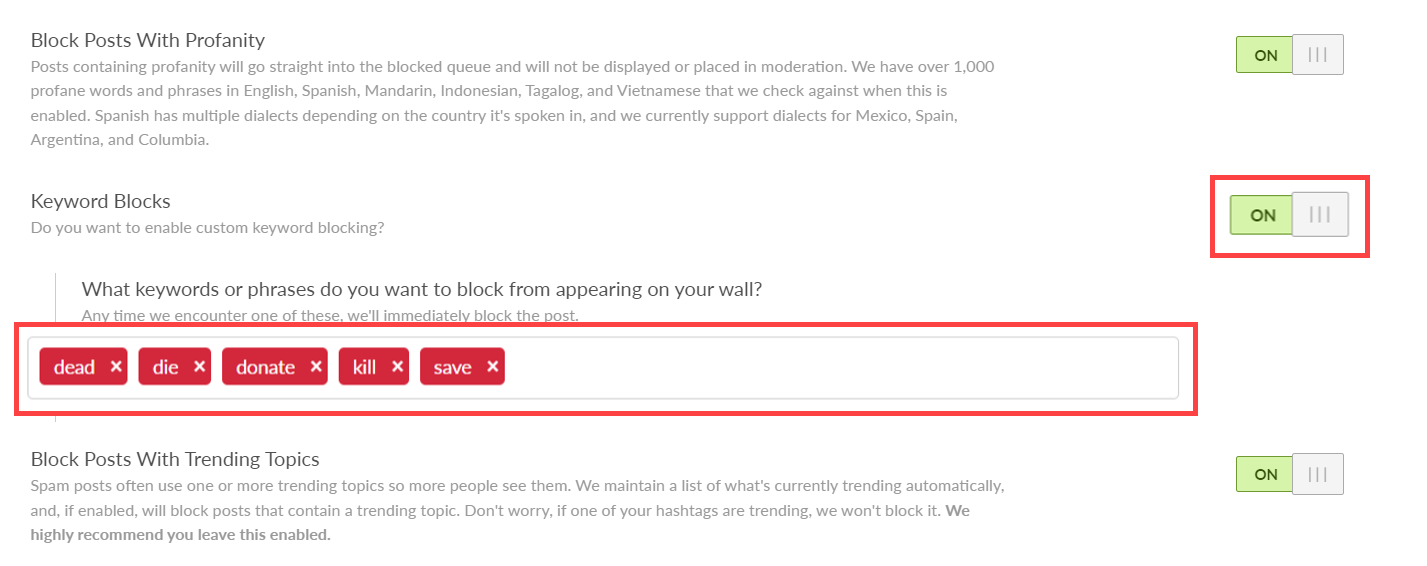
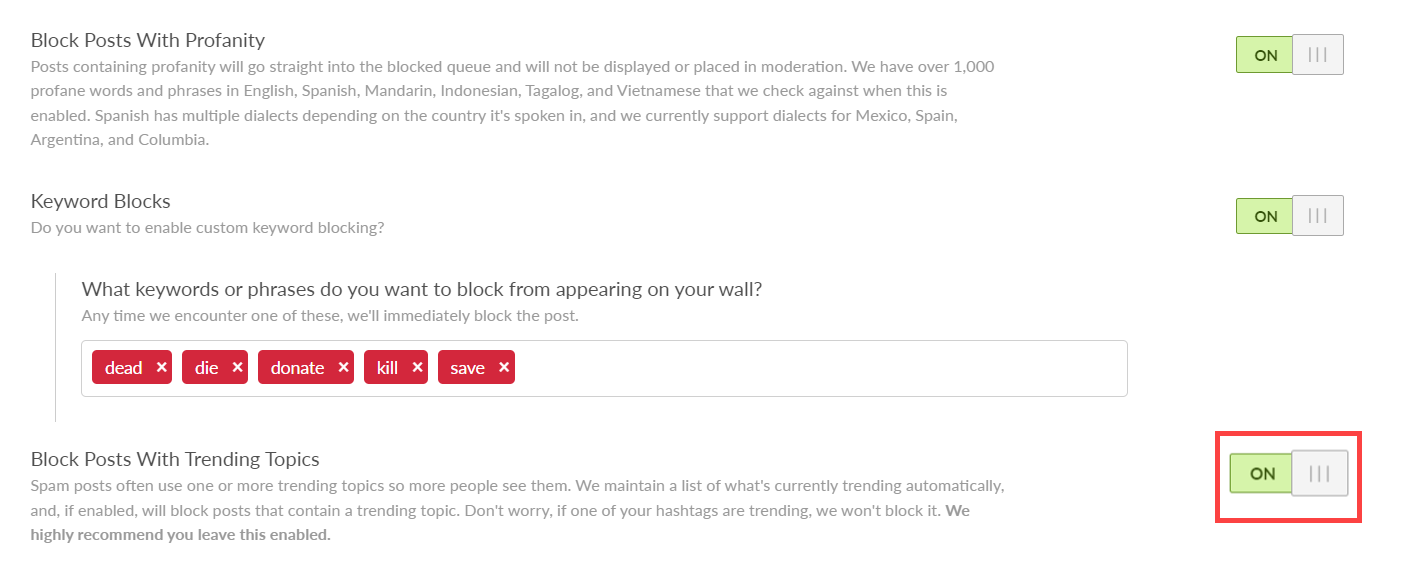
Trending Topic Filter: Spam posts often use one or more trending topics to gain a wider audience. We have an automated system that continuously tracks current trending topics. When enabled, this system will prevent posts featuring trending topics from being displayed. Rest assured, if any of your hashtags are trending, they won’t be subject to blocking. We strongly suggest keeping this feature enabled.
Hashtag Limit Filter: Enable the toggle to limit the number of hashtags. Posts that contain many hashtags are often spam. When this feature is enabled, you can specify the maximum number of hashtags that are allowed to be in a post.

Media Filter: You can choose what type of posts you wish to display on your social wall by the type of media that is or isn’t included.
- Allow any post, with or without media: This option allows all types of posts to be displayed on your social wall, and is the recommended setting for most social walls.
- Only allow posts “with” media, others will be blocked: This option requires a post to have a photo or video. If there’s no media attached to the posts, it will block the post and move it to the blocked queue.
- Only allow posts “without” media: This option will prevent posts that have media attached from being displayed. If there’s a media attached in the posts, we’ll block the post and move it to the blocked queue.
- Please note that if you do not want to display media with the post, there is a setting on the design screen to hide the media so you do not need to block the posts if you do not want to show the media.

Still have questions? Get in touch.