How to Add Everwall Direct (Web Form)
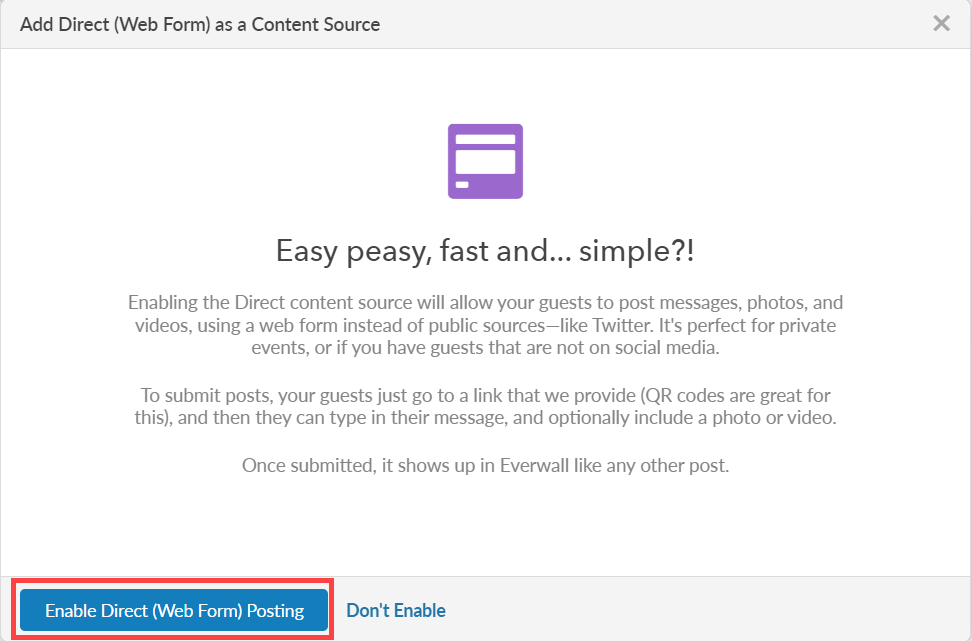
Enabling the Everwall Direct content source will allow your guests to post messages, photos, and videos using a web form instead of public sources—like X (Twitter) or Instagram. To submit posts, your guests just go to a link that we provide (QR codes are great for this), and then they can type in their message, and optionally include a photo or video. Once submitted, it shows up in Everwall like any other post.
The web form is great for private events, or for providing a way to interact with your social wall if your guests are not on social media. It’s mobile-friendly, seamlessly matches the design of your social wall, and supports posts in any language (instructions can be in any of the nine languages available on our walls), enabling guests to post in their preferred language.
Additionally, it can be easily embedded into your website or in an event app, facilitating direct posts from your guests through the app. If you like to know more about submitting a post using Everwall Direct, you can read this tutorial.
How to Add Everwall Direct as a Content Source to Your Social Wall or Social Media Hub.
Step 1: In the content sources page, select Direct (Web Form) as your content source. If you’ve already added another content source, you’ll see the icon below the list of existing content sources.
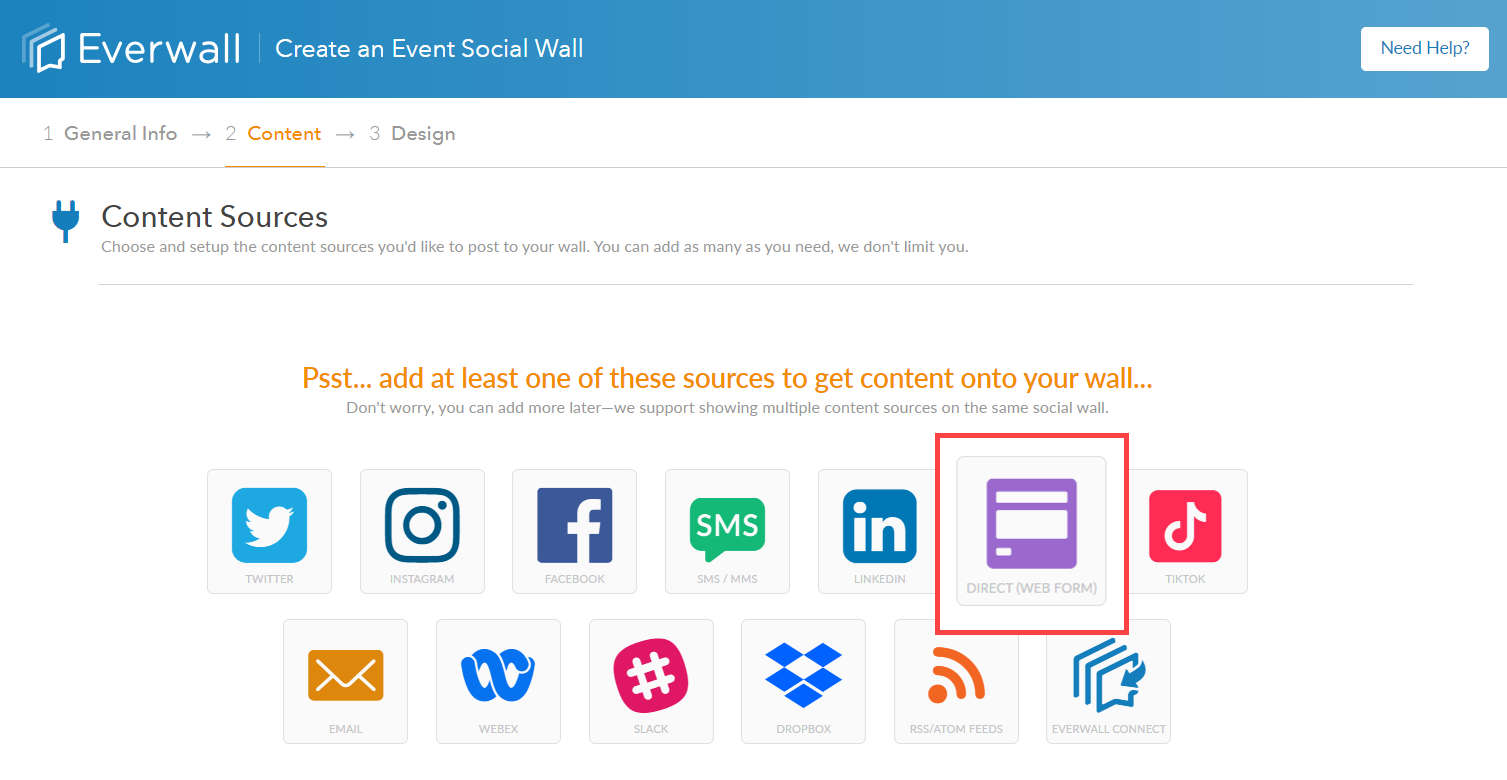
Step 2: Click the Enable Direct (Web Form) Posting to allow guests to post messages, photos and videos using a web form.
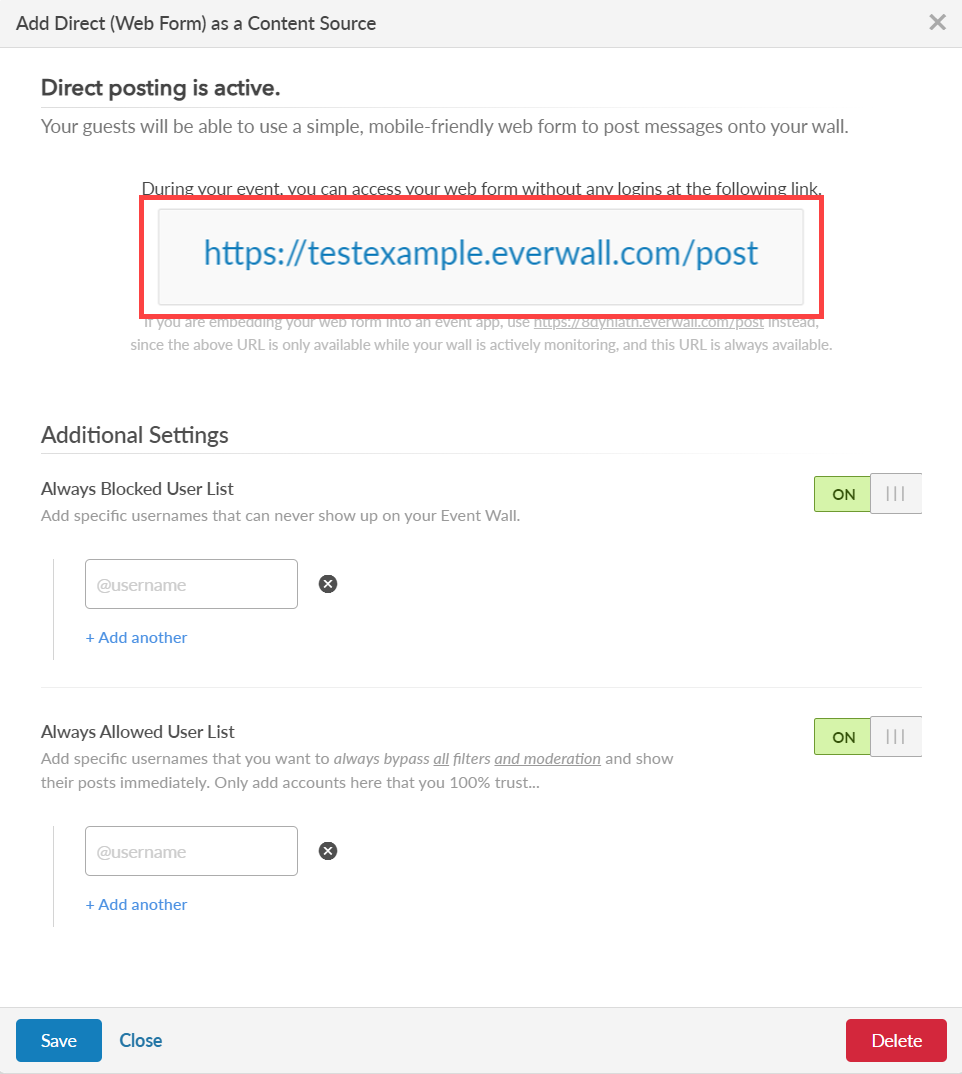
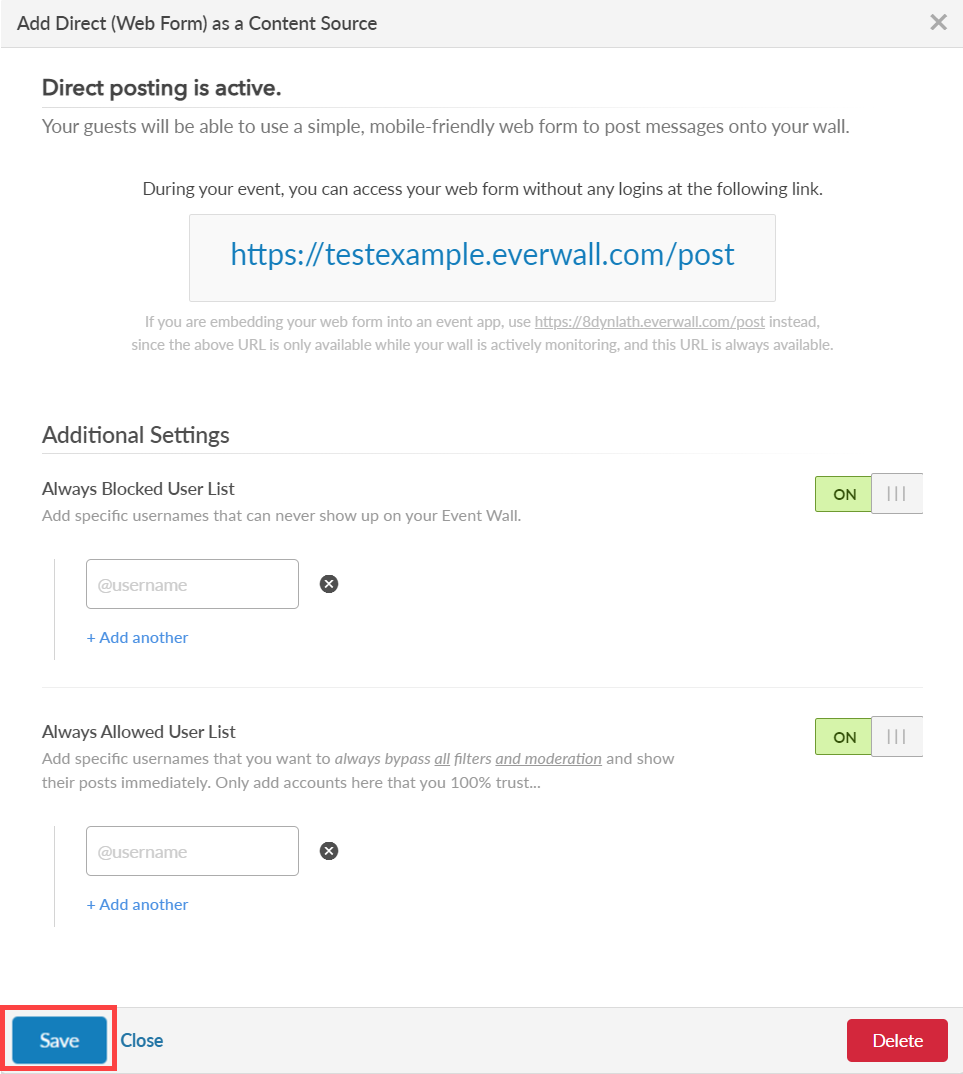
Step 3: After enabling Everwall Direct, you will see a confirmation that it’s been enabled, and be provided with the link that you can share to your guests so that they can post to your Social Wall.
Your guests can access the web form without any logins and allows them to submit messages, pictures, and videos. If you have moderation enabled, the post will go through that process, otherwise, it’ll appear instantly on your social wall if it passes your configured content filters.
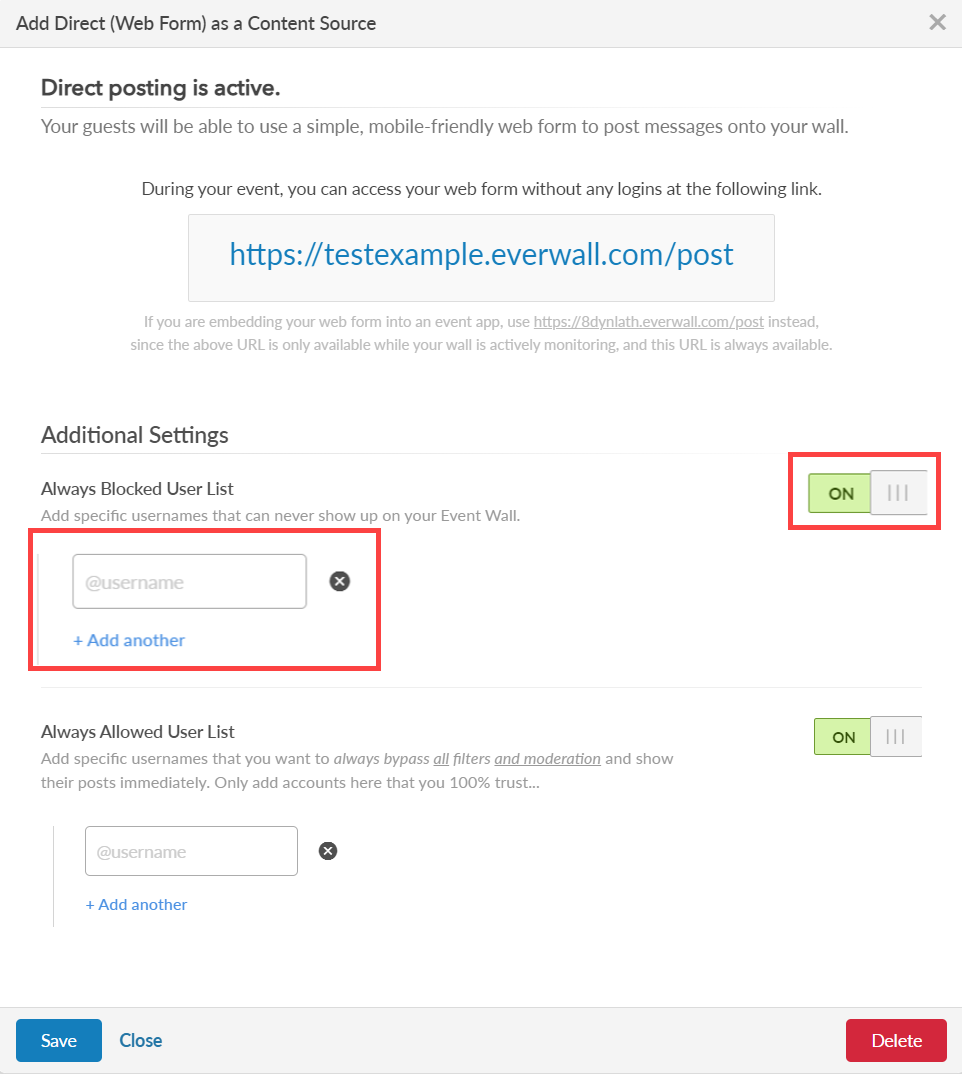
Step 4: Under Additional Settings, there’s two options for always allowing users, and always blocking them. If it’s set to Off, it means the list is empty, however, you can turn it on and add usernames here manually if needed. During the initial setup, you’ll likely leave these off.
Step 4a: If you want to add a user to one of these lists, toggle the switch to On, and then specify their username to add them on the list. You can more easily add people to this list from the Posts page while managing posts (just hover over their username and select to add them to the Always Allowed or Always Blocked list).
Step 5: After optionally adding users under Additional Settings, click Save to add Everwall Direct as a content source.
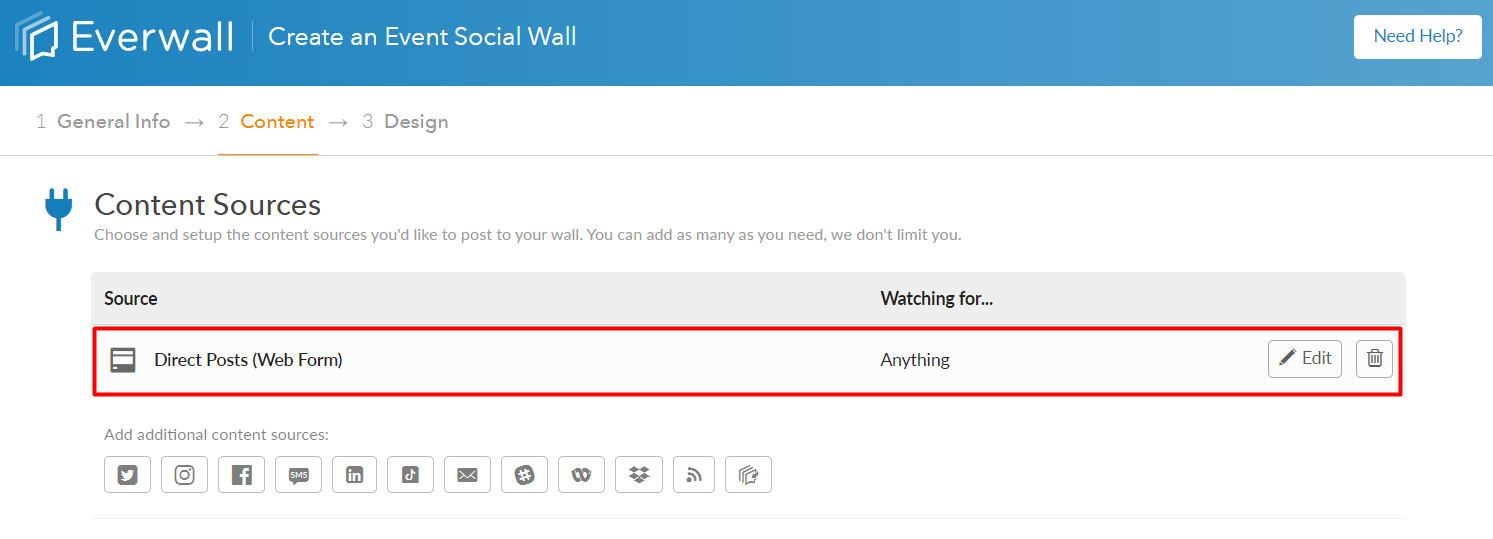
Step 6: Once Everwall Direct is enabled, you will see Direct Posts (Web Form) in the list as your content source.
Still have questions? Get in touch.