How to Add a Credit Card to Your Account
There are two places you can add a credit card in Everwall. You can add it when making any purchase, or you can add it in advance of a purchase in your account settings. This tutorial will guide you through adding a credit card through your account settings.
Saving the credit card to your account settings is straightforward and secure. Everwall does not store this information directly, instead our credit card merchant account stores the information (Stripe). By storing the card in your account, it ensures seamless processing for any upcoming automatic charges, such as subscriptions, and makes purchasing other one-time services, like social walls, easier.
You can remove your saved credit card details at any time.
Note: Once a card is added to your account, you cannot add another one unless you delete or replace the existing card, as only one card can be stored at a time. You can also update or change the card during the purchase of a social wall or through the account settings
How to Add a Credit Card to Your Account
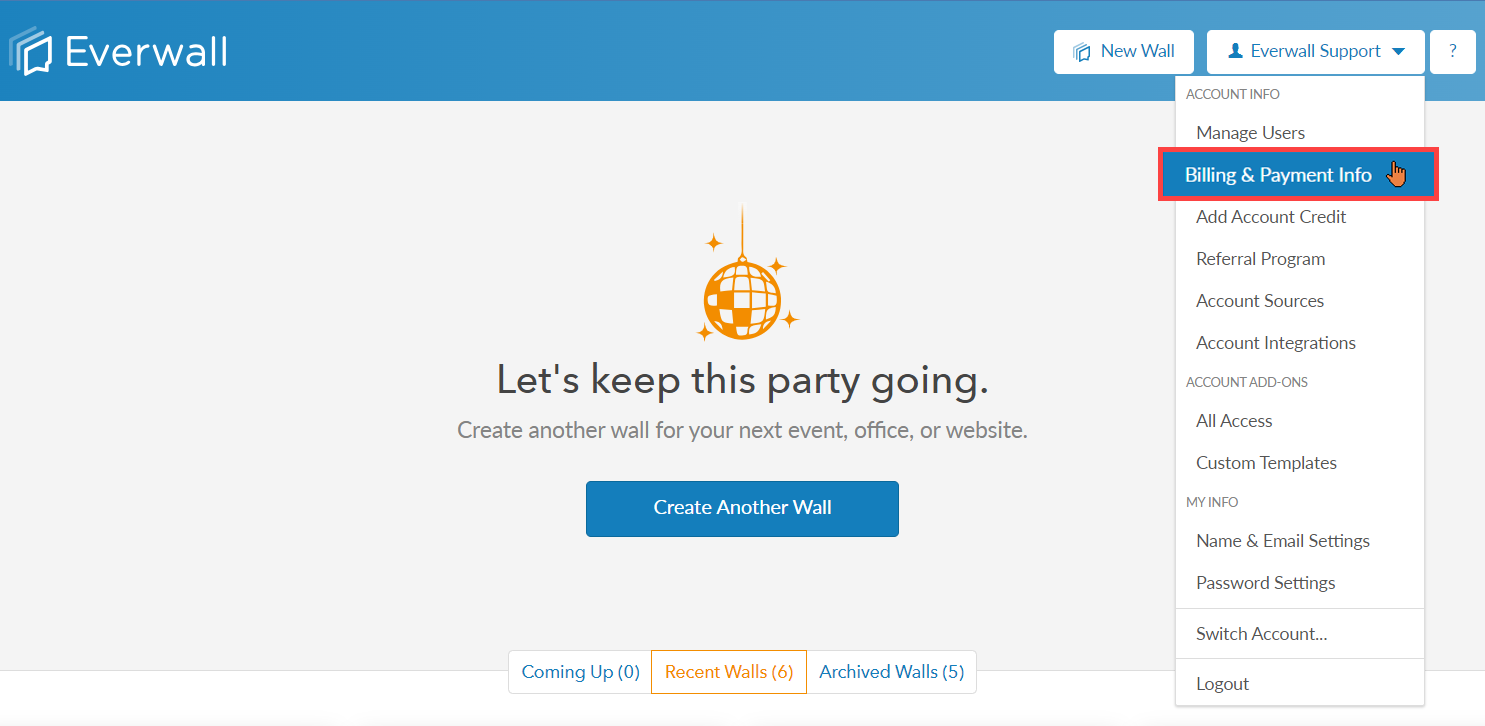
Step 1: Click your name to view the dropdown menu options, then click Billing & Payment Info option.
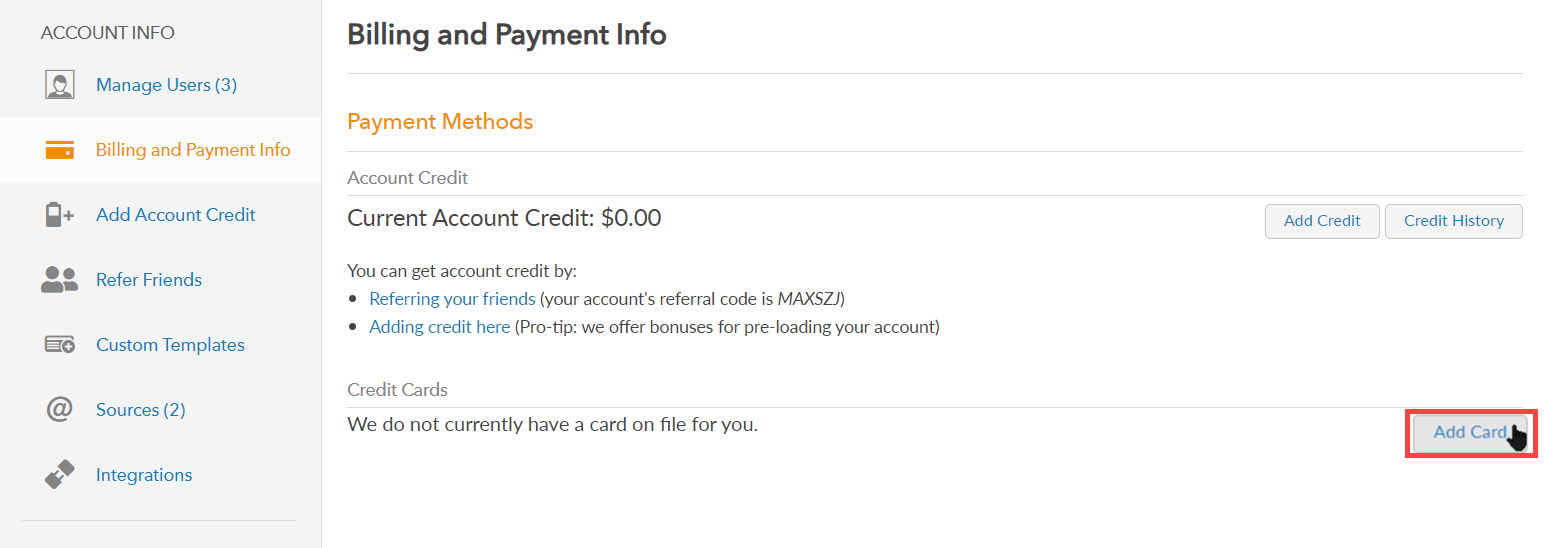
Step 2: After clicking the Billing & Payment option, you will be directed to the Billing and Payment Info page where you can see the credit card details. Click Add card to enter your cards details.
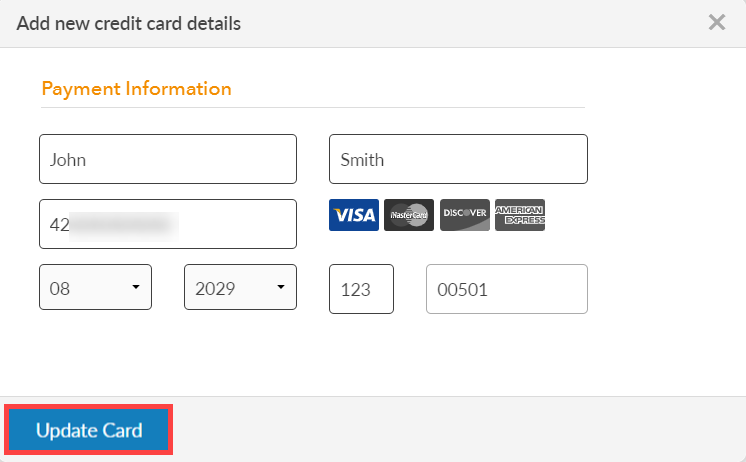
Step 3: Enter your credit card details such as: First Name, Last Name, Card Number, Expiration date, CVC and Postal Code then click Update Card to add your credit card to the account.
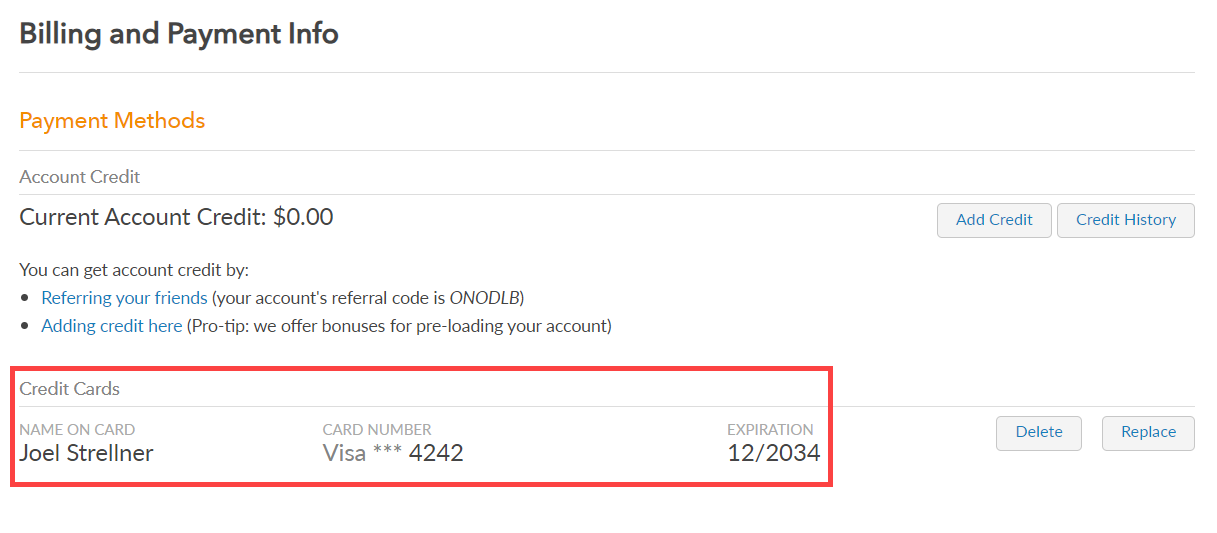
Step 4: Once you’ve finished adding the card information, your credit card will be added to Everwall and will be used for all upcoming charges.

Step 5: The new card details will now be displayed on the Billing and Payment Info page.
Still have questions? Get in touch.